


Tree of Life with Live Edge Slab
During our 2024 Excellent Adventure, we stopped to visit Myhra’s brother Richard and his wife LaRae in North Dakota. They are both woodworkers, and Richard gifted me a large live-edge slab of maple, about 15 inches wide and six feet long. The bark edge was in great shape, and it had been well seasoned after 20+ years in their shop.
I decided to cut the salt into three pieces, flatten them, and then use my optical router to fashion some items for myself and both brothers. This required that I build a router sled for flattening the rough slabs. Manufactured flattening sleds can be quite costly, but I found a kit from my favorite woodworking supplier, Lee Valley.
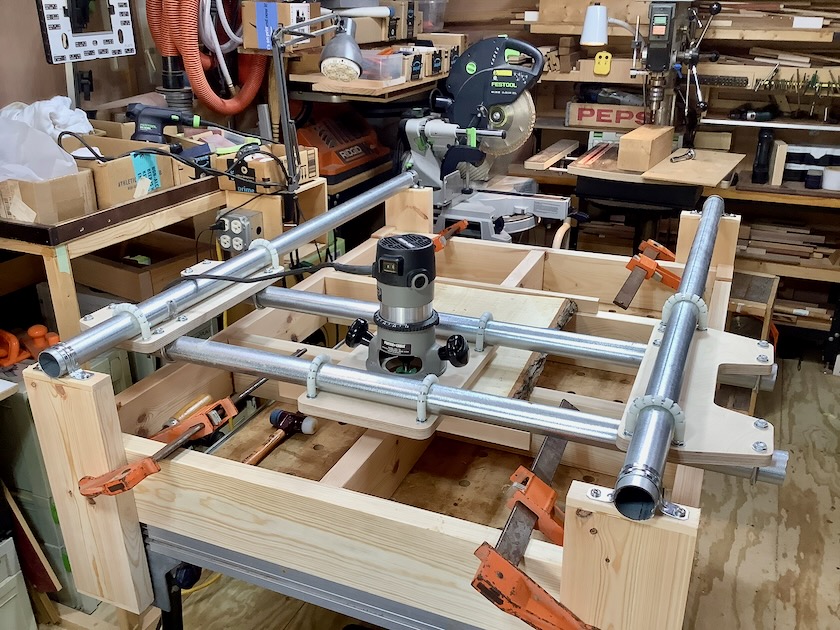
I designed the sled to fit the size of the work, with the intention of using it on my trusty Festool assembly table. The design made it easy to disassemble for storage. The sled uses common 1 1/2-inch steel pipe, commonly used for electrical conduits. A clever arrangement of plastic spacers stacked on a U-bolt allows for the x-y translation of the router. The router itself was my larger Porter Cable with a 1 1/2-inch facing bit.
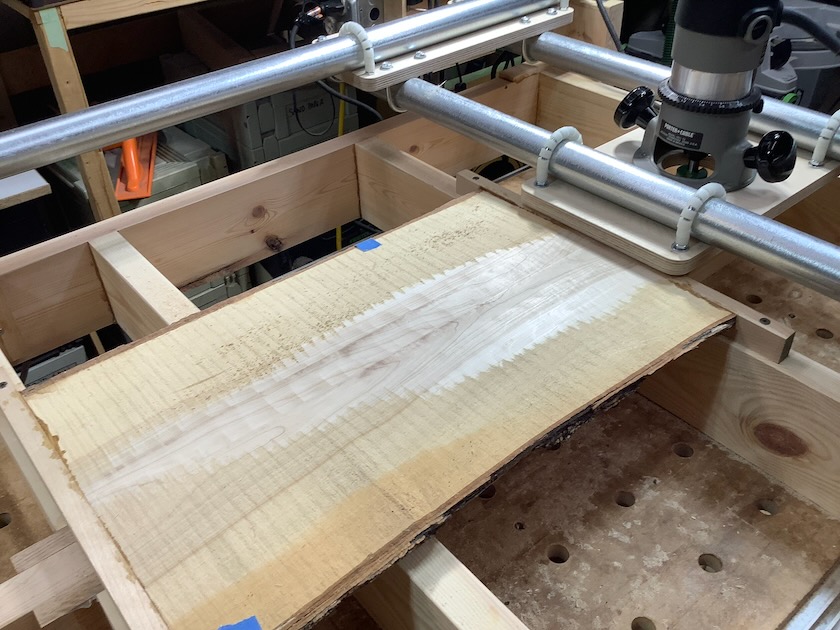
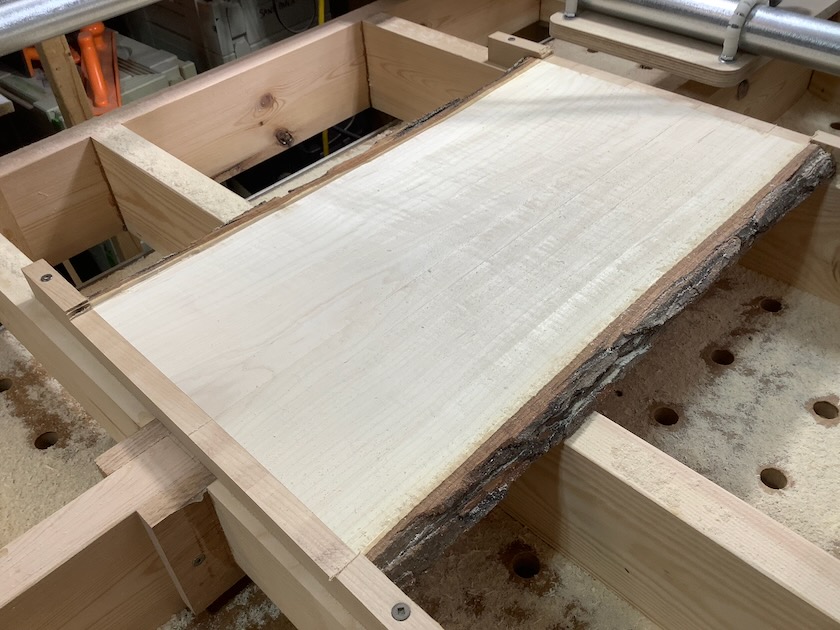
I glued some strips on either end and fastened the slab to the base of the sled. I lowered the bit about 1/16″ per cut. I had to use a full-face mask and respirator as the sawdust flew everywhere! I cut the slab down with long cuts. For the final cut, I moved it side to side as I traversed the length of the board. The bit was ever so slightly tilted, but the result was better than I expected. I finished it with 80-grit sandpaper.
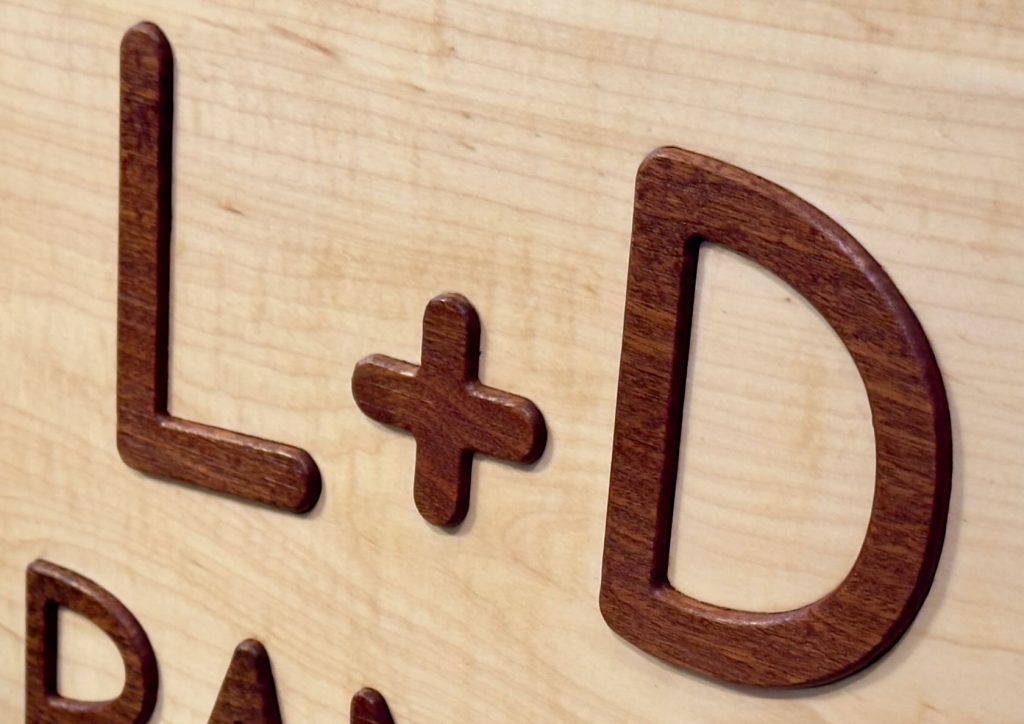
L+D Ranch

I made the letters out of mahogany. They were designed to protrude slightly from the surface. I then used a very small router to round the tops of the letters. I think it is a very nice 3D effect!
Tree of Life
This was my most detailed inlay work so far. I cut the pieces out of paper-backed veneer with no substrate. I had good luck with that on my last work. 45 individual pieces were cut along with the large, detailed tree.

This involved using progressively smaller bits, 3/32″ and 1/16″ for the sharp corners and overlap in the cuts. I numbered each piece as I cut out the leaves. Finally, a lot of detail trimming and sanding to achieve a (often) perfect fit! Every time I do something like this, I am stunned by the accuracy of the Shaper router. This was always something I wanted to be able to do, and I did it a few times by hand, which was very time-consuming and not as accurate.
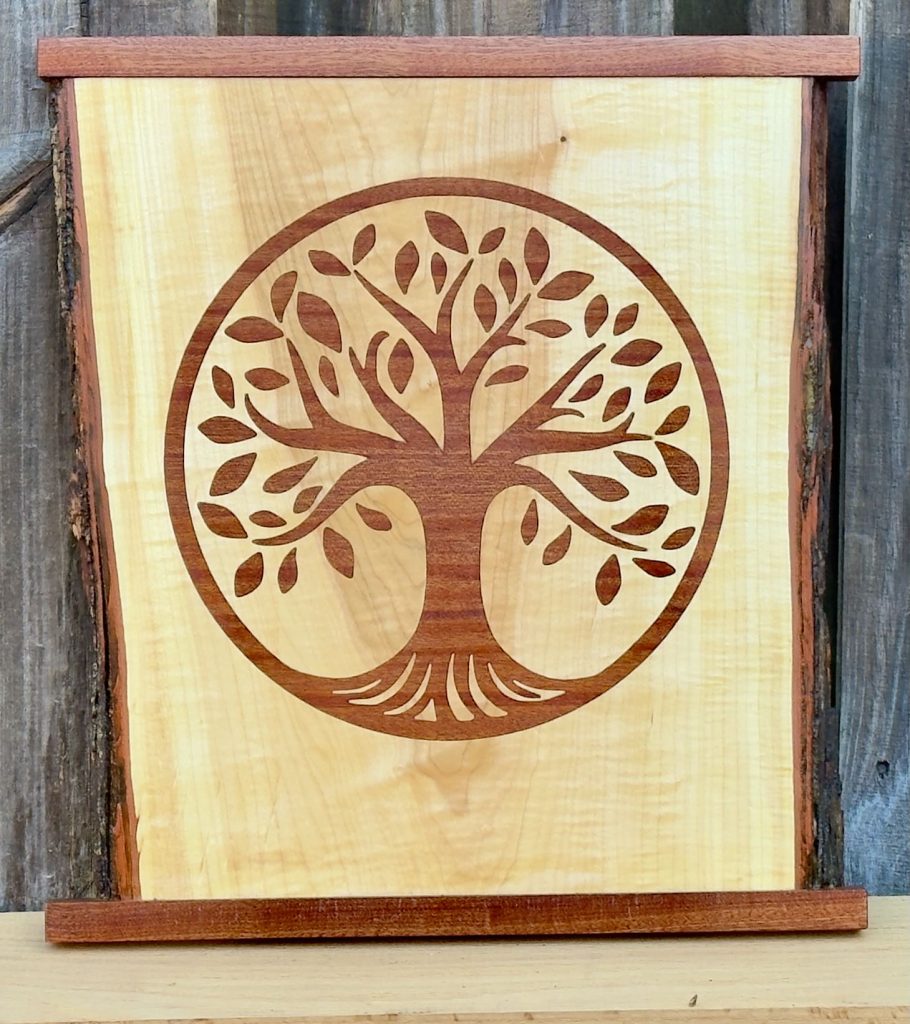
I finished all of the pieces with Rubio Monocoat epoxy finish. It sealed the bark edges very effectively, so I feel confident they will remain in place.