During our 2024 Excellent Adventure, we stopped to visit Myhra’s brother Richard and his wife LaRae in North Dakota. They are both woodworkers, and Richard gifted me a large live-edge slab of maple, about 15 inches wide and six feet long. The bark edge was in great shape, and it had been well seasoned after 20+ years in their shop.
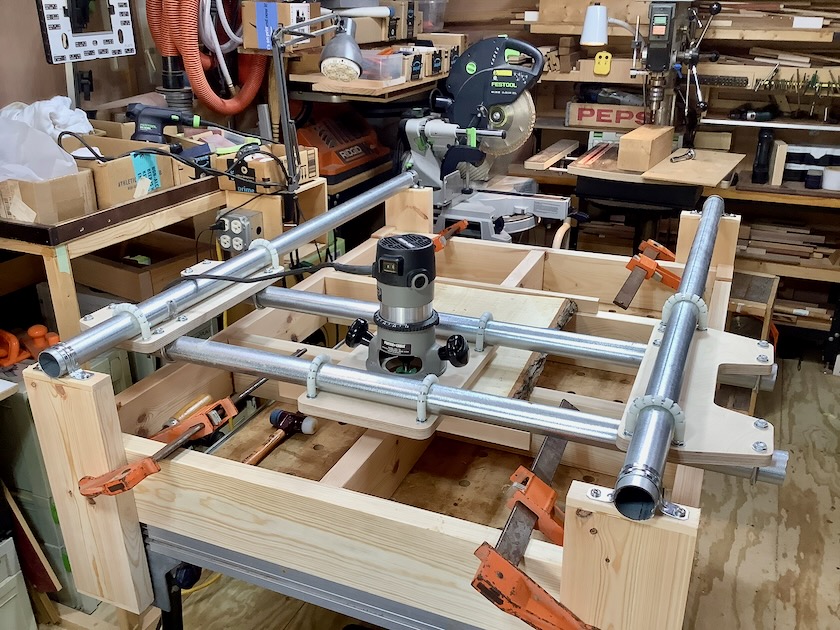
I decided to cut the salt into three pieces, flatten them, and then use my optical router to fashion some items for myself and both brothers. This required that I build a router sled for flattening the rough slabs. Manufactured flattening sleds can be quite costly, but I found a kit from my favorite woodworking supplier, Lee Valley.
The sled straddles a base made from 2 x 6 lumber. The rails are made from 1 1/2″ EMT conduit. The sled moves easily across the slab fixed to the base. The router holding a 1 1/2″ surfacing bit is mounted to the sled.
I designed the sled to fit the size of the work, with the intention of using it on my trusty Festool assembly table. The design made it easy to disassemble for storage. The sled uses common 1 1/2-inch steel pipe, commonly used for electrical conduits. A clever arrangement of plastic spacers stacked on a U-bolt allows for the x-y translation of the router. The router itself was my larger Porter Cable with a 1 1/2-inch facing bit.
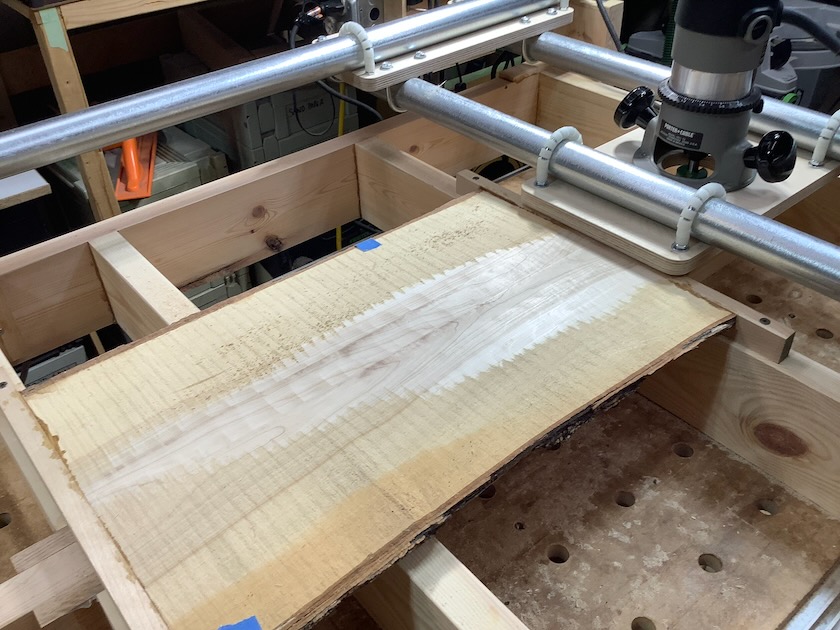
I took small cuts to insure a smooth operation. Sawdust flew everywhere!
I glued some strips on either end and fastened the slab to the base of the sled. I lowered the bit about 1/16″ per cut. I had to use a full-face mask and respirator as the sawdust flew everywhere! I cut the slab down with long cuts. For the final cut, I moved it side to side as I traversed the length of the board. The bit was ever so slightly tilted, but the result was better than I expected. I finished it with 80-grit sandpaper.
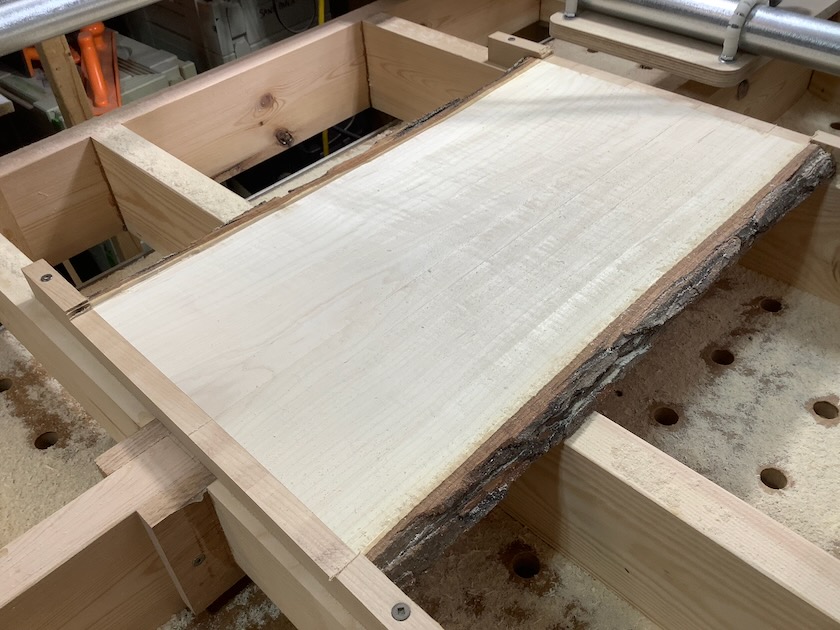
A finished surface. I was happy the bark was also cleanly surfaced. Some sanding with 80 grit sandpaper removed any unevenness left by the cutter head.
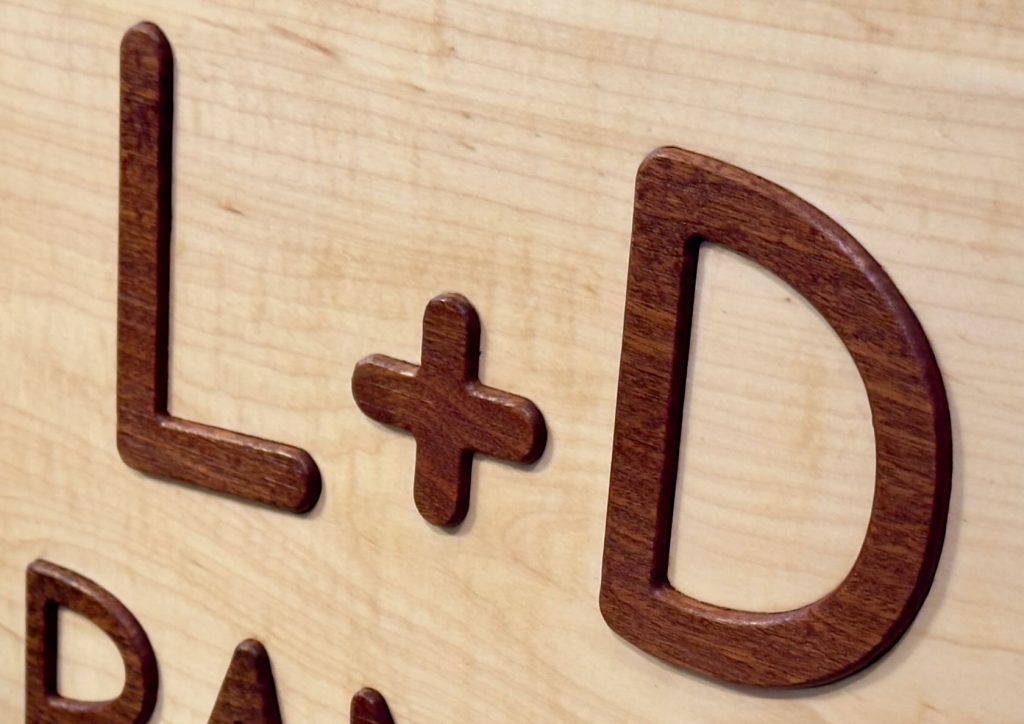
L+D Ranch
I made the letters out of mahogany. They were designed to protrude slightly from the surface. I then used a very small router to round the tops of the letters. I think it is a very nice 3D effect!
Detail showing raised lettering
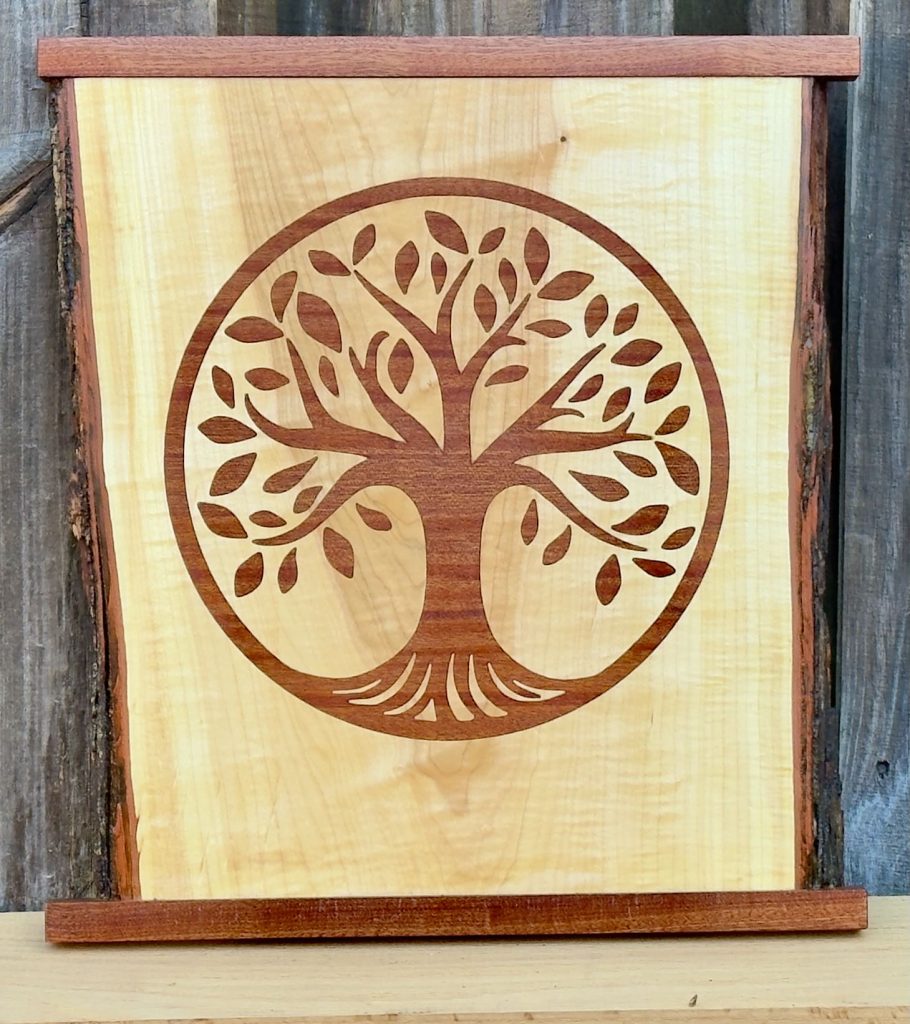
Tree of Life
This was my most detailed inlay work so far. I cut the pieces out of paper-backed veneer with no substrate. I had good luck with that on my last work. 45 individual pieces were cut along with the large, detailed tree.
I found this design on line as an image file. I used a very nice file converter that created a SVG format file required for the CNC programming.
This involved using progressively smaller bits, 3/32″ and 1/16″ for the sharp corners and overlap in the cuts. I numbered each piece as I cut out the leaves. Finally, a lot of detail trimming and sanding to achieve a (often) perfect fit! Every time I do something like this, I am stunned by the accuracy of the Shaper router. This was always something I wanted to be able to do, and I did it a few times by hand, which was very time-consuming and not as accurate.
This is one of two I crafted along with the one at the top of the page. I wanted to give my sister-in-law Myhra and brother Rick somthing from the live edge slab Myhra’s brother Richard gave me on Excellent Adventure 2024.
I finished all of the pieces with Rubio Monocoat epoxy finish. It sealed the bark edges very effectively, so I feel confident they will remain in place.
Celebrating ten years back home at 28° 19′ N by 80° 36′ W!
This year marks my tenth anniversary of returning home. It’s mind-boggling, really, that it’s been that long, but then again, it’s pretty hard to believe that next year will mark my seventh year of existence here on Mother Earth.
Teak End Table circa 1991
As noted elsewhere, I developed a passion for woodworking early. In my first ‘garage/shop’ in Washington, I proudly displayed a hand-lettered sign that said:
He With The Most Toys Wins!
When I moved to Germany in 1987, I closed shop until my return three years later. I had moved back to Colorado and was living the dream, traveling around the world and working at Hewlett-Packard’s corporate machine. I outfitted my basement as my first dedicated woodworking shop with new stationary tools. There was an excellent lumber store in Fort Collins. I used our most excellent 2D CAD system—ME 10—and started designing and building the furniture for my new home in the Rockies.
CAD drawing for Teak Stereo Cabinet circa 1993
For a while, I thought Colorado might be my new home. I liked it there. Unfortunately, the job was changing fast, and I found myself on the outside looking in. In a stunning display of madness, I made a sharp right turn and ended up in Atlanta for nearly 19 years. The last 15 years were spent as a different version of myself, constantly at odds with the part I left on the left coast.
When I finally escaped the madness, I ended up back where it started: Cocoa Beach. I was home and have now lived here longer than anywhere else. I had envisioned this day for decades, which was one reason I moved to the Southeast in the mid-1990s. After I retired in 2020, I built a dedicated shop in my backyard.
Before I escaped, I had to refinish that first piece of furniture that I built for myself (and still owned). I screwed up and sanded through the teak veneer while refinishing it. After moving back, I had an idea to replace the top with a compass rose with the position of Cocoa Beach on it. It was on my list for over ten years before I acted.
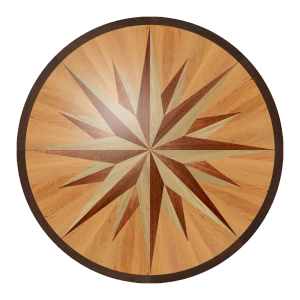
When I first saw the Shaper Origin router demonstrated several years ago, it showed a craftsman using it to inlay a compass rose on a hardwood floor. That is precisely what I was looking for! My comments concerning this incredible tool are elsewhere.
Build
AutoCAD design sans lettering. I used this for the individual segments.
I created the base layout using AutoCAD, imported it into Shaper Studio, and added the lettering.
My idea was to use walnut and maple for the rose pieces and zebrawood for the ring segments. The background would be quarter-sawn mahogany, and the lettering would be maple.
The lettering capabilities had recently been upgraded, and I found a simple letter font that worked well for inlay. There is no lettering on a curve capability yet, but manually rotating the letters worked well enough.
Shaper Studio. The base design was imported as a DXF. The lettering was added using the Text feature. The interior parts of the rose (not shown here) were cut out separately.
I quickly learned that paying attention to the jig used to lay out the optical tape for the router pays off. I try to keep everything coplanar and provide surfaces for moving the tape smoothly. Once a good set of markers is established, I am always stunned at the router’s accuracy and repeatability.
Routing layout. The mahogany veneer is glued to 1/8 inch baltic birch and is held securely with screws and double-sided tape. The additional panels on top and bottom have been adjusted to be approximately co-planer with the work. Everything is screwed or taped onto the 1/2-inch MDF underlayment. Optical tape is applied every three inches.
The first step is to cut the main layout, which is cut precisely as designed. Offset is added when cutting the ‘puzzle’ pieces to facilitate assembly.
Cutting the main layout. The display is zoomed out to show the entire work area. Everything was aligned visually against reference points on the veneer.
Completed cutout. The only adjustments needed are to cut the ‘points’ when the inlaid pieces are added.
Double-sided tape keeps the pieces in place, and the through cuts are made. The cut pieces are easily removed by gently lifting them with a small, smooth pry bar.
The next step was to cut out the interior pieces. I used the Shaper Workstation to do this. I learned that adding about 0.005″ inch offset to make these pieces undersized made for easy placement with no sacrifice in appearance.
Interior pieces are cut out quickly using the Shaper Workstation.
Final Layout. I cut out 12 Zebrawood ring segments so the grain ran roughly parallel to the radial lines. The final result was exquisite.
The next step was new for me and involved cutting the letters directly out of 0.030″ wood veneer with a paper backing. The letters were small, too, especially some of the symbols. I held the veneer with double-sided tape and cut the letters to size. I was impressed at how resilient the cut letters were when removing them from the tape and cleaning the edges. It was much easier than I anticipated.
Inlaying the lettering. I used the Shaper Plate to cut a slightly oversized pocket to glue the cut letters. A 0.008-inch offset was about correct for the thinner veneer.
The final step was to add the coordinates. I used the original larger design to facilitate cutting the pockets for the individual letters. I was impressed with how accurately I could set up the tool paths using visual references.
Adding the coordinates: I returned to the larger cutter layout to apply the smaller coordinate letters. I used the N letter to visually align the layout of the work. Again, I was impressed at the tool’s accuracy, as the letters aligned perfectly with the original design.
Inlaying work done. Coordinates were added to the ring.
Cutting the slightly smaller letters, including the small degree and minute symbol, was no problem. I glued each one in as I cut them. This was, again, much easier than I anticipated.
Final with Paduak frame and finished with Monocoat pure and Sheen.
The final step was to cut to size and add the outer edge. I used Paduak for this, which I thought made the piece pop.
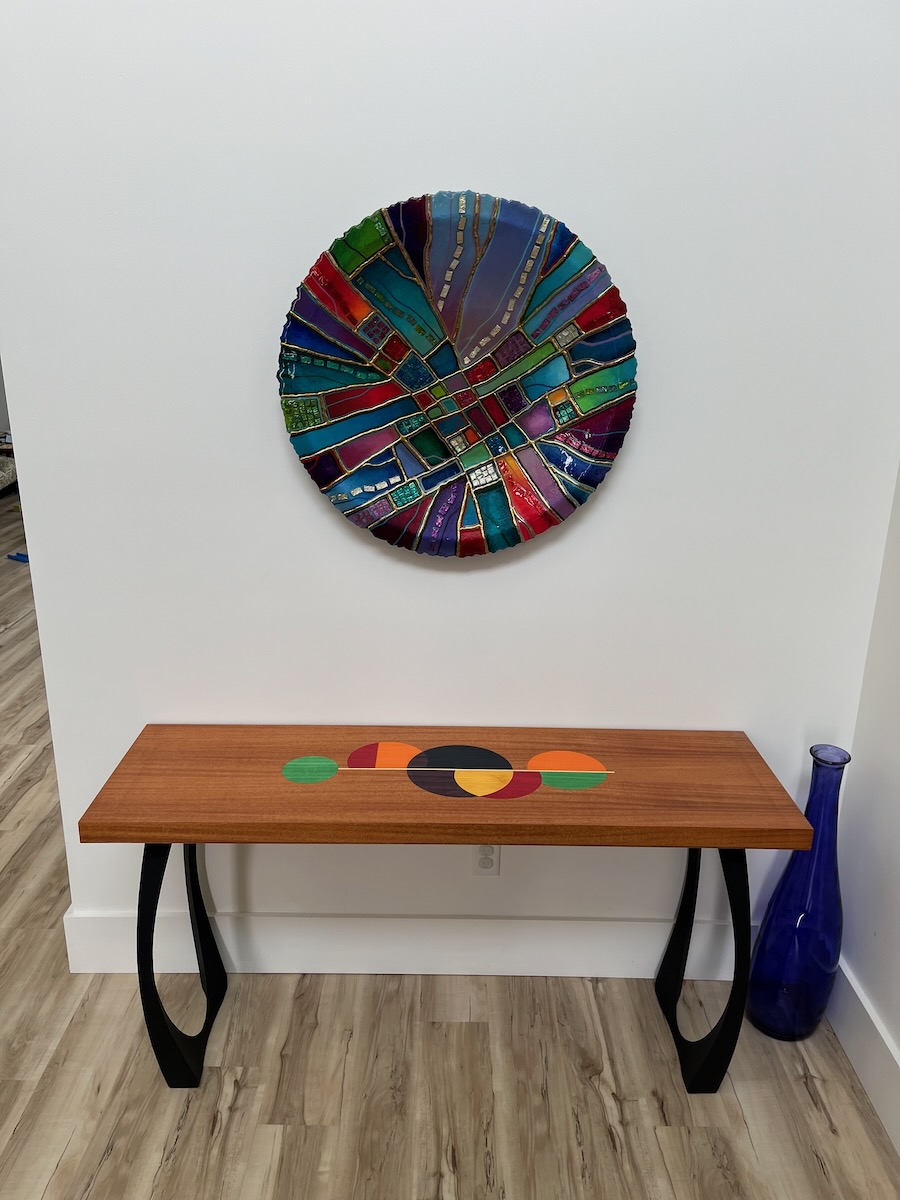
My most recent woodshop project came from an idea my brother Dave had. They have been decorating their new home with art and furniture reminiscent of the midcentury modern style. Dave had an idea for a design with colors that matched some of their other art.
The original design that Dave and Lisa liked from a home furnishing website.
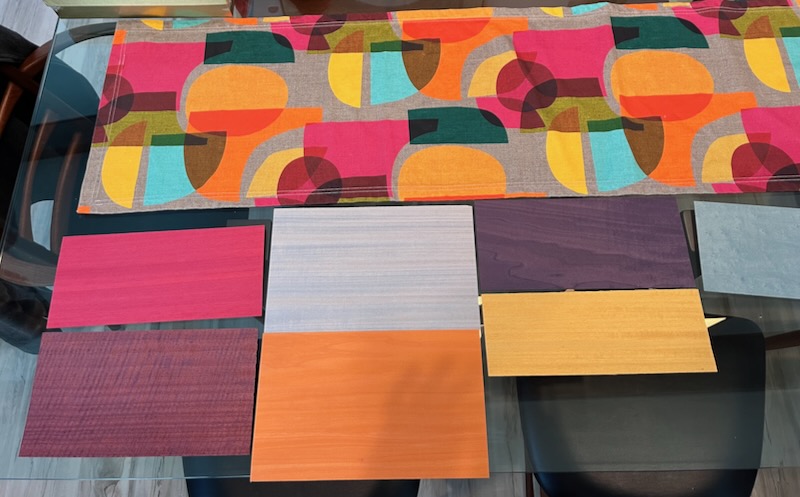
I had some colored veneer from an older project that we looked at with a table runner they had. Things were looking good!
Table Design Colors – The table runner is on top, and the veneer samples are below. Some of the colors were a perfect match!
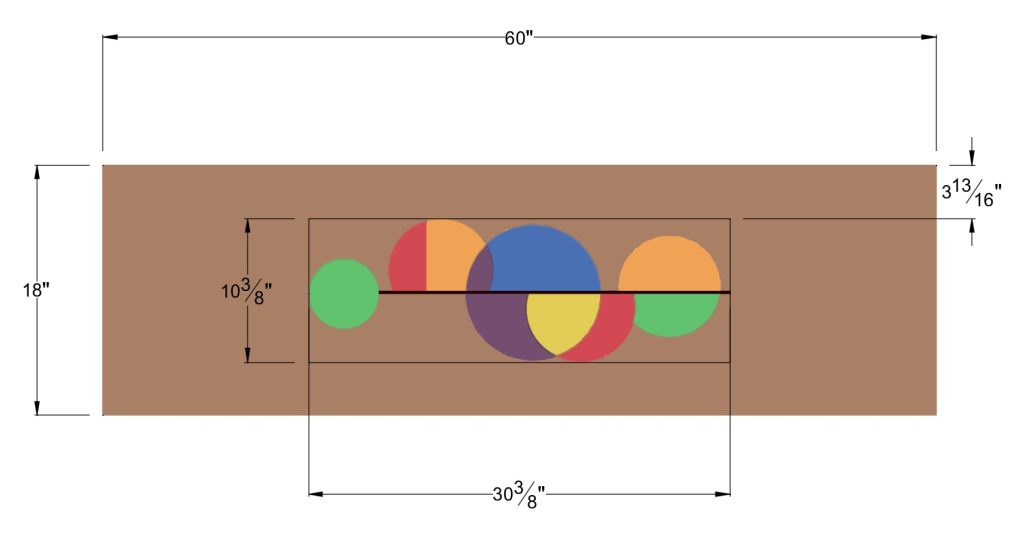
I worked up a design in AutoCad using the image as a guideline.
AutoCAD layout showing the design colors. The outlines are imported into Shaper Studio to be used by the Origin Router to cut the shapes.
Dave wanted to match the wood to the mahogany used on their beautiful doorway. I was able to get a beautiful quartersawn veneer online together with the dye-strained colored veneer. We were in business!
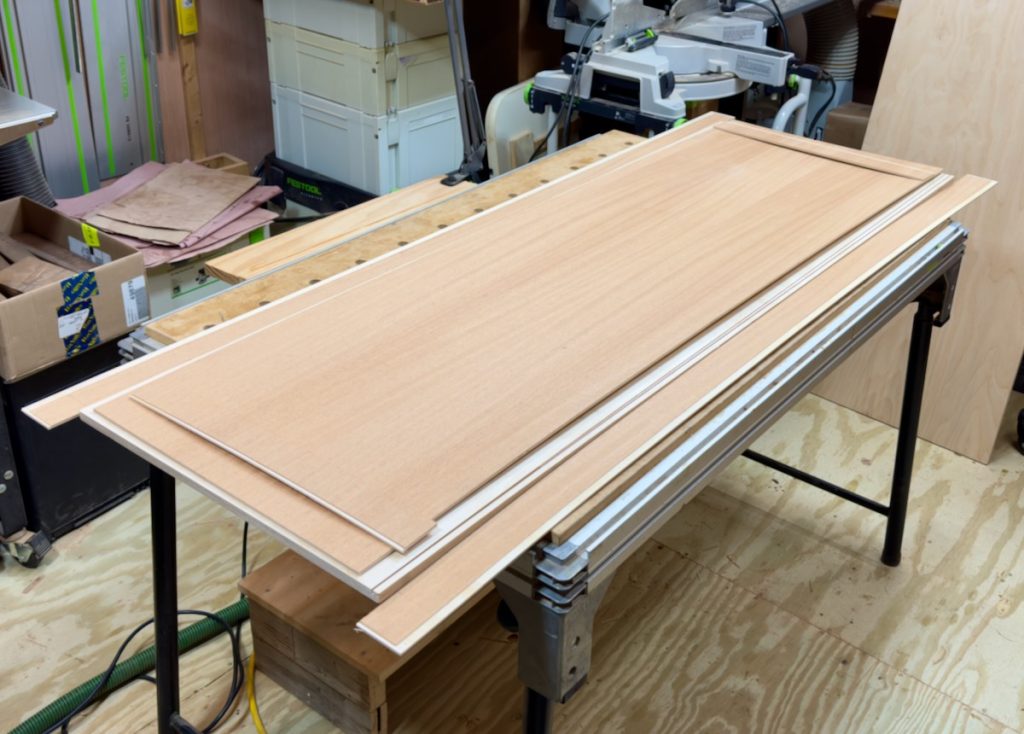
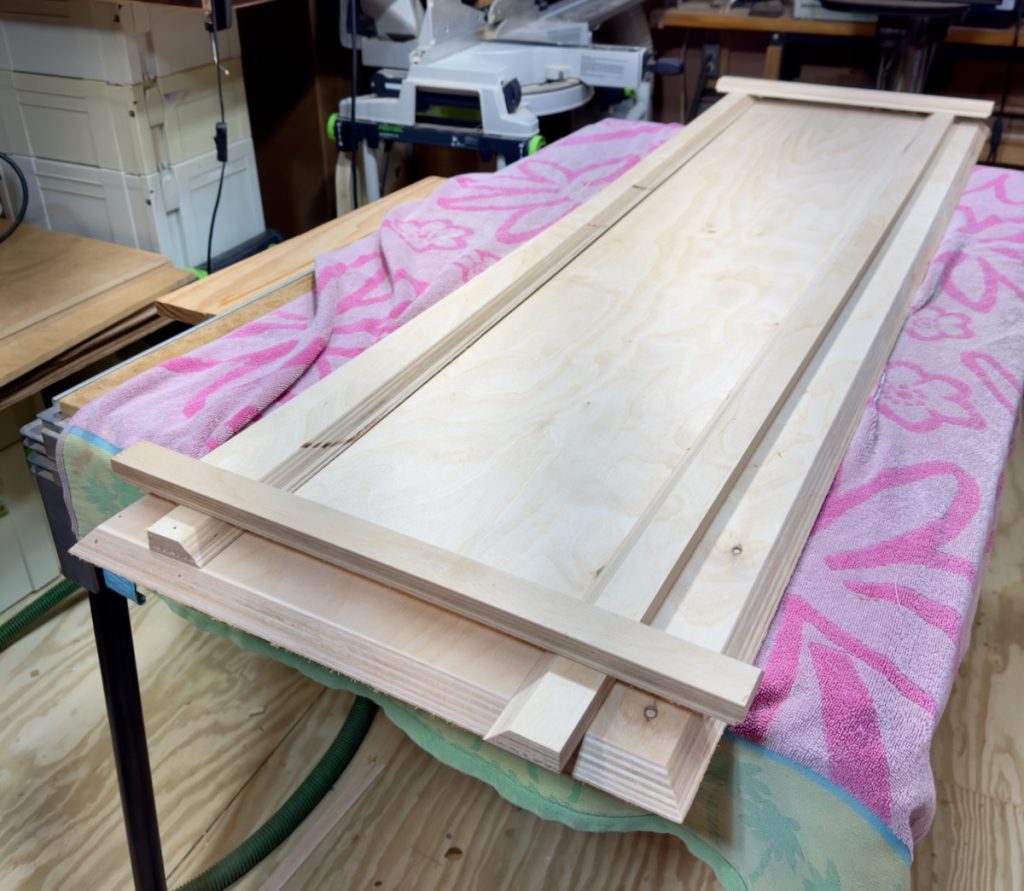
Book-matched table layout. The mahogany veneers for the top and sides are on the 1/8″ plywood substrate.
I carefully laid out the first cut after gluing the veneers to 1/8″ baltic birch plywood.
A new 4′ x 6′ vacuum bag was needed for the bigger table. The mahogany veneer is glued to 1/8″ baltic birch plywood.
The outline of the shape was extracted from the AutoCAD file. I imported it into the Shaper Studio software and uploaded it to the router.
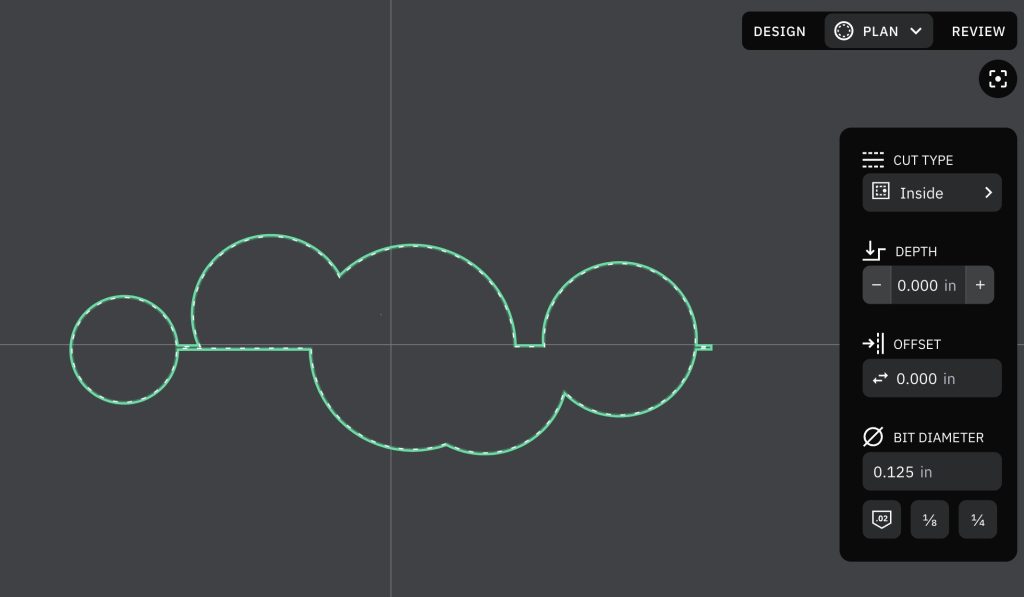
Shaper Studio allows the import of AutoCAD DXF files. This view shows how the 1/8th cutter is moved along the path to cut the interior section. This file is uploaded to the router on a small thumb drive.
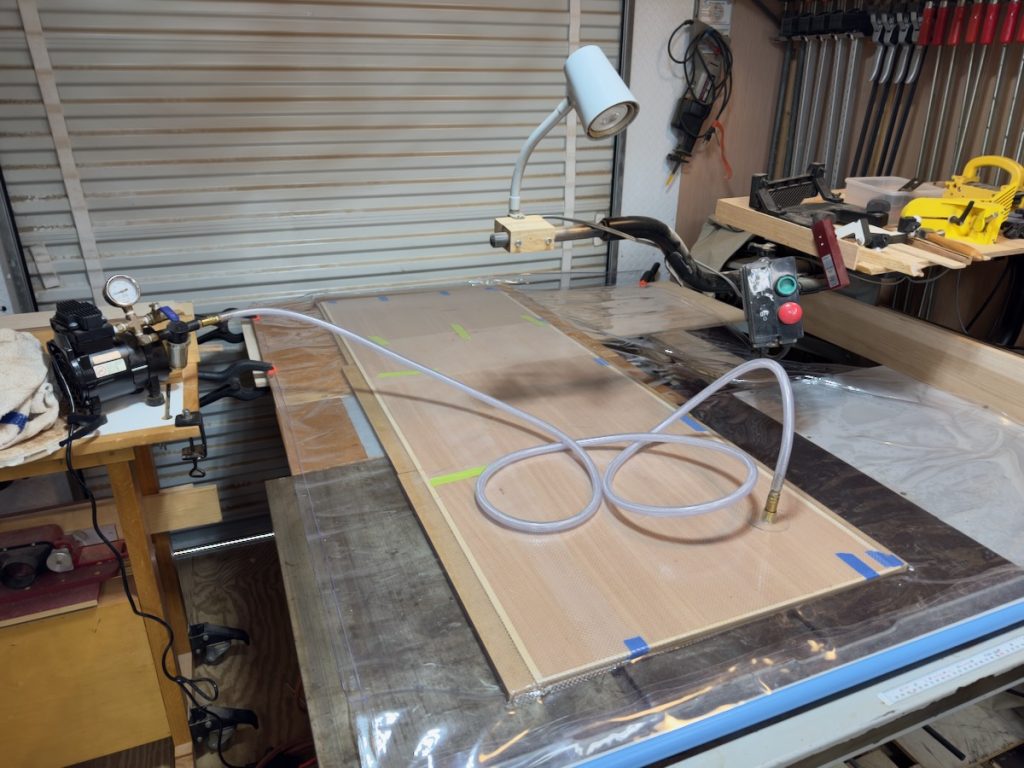
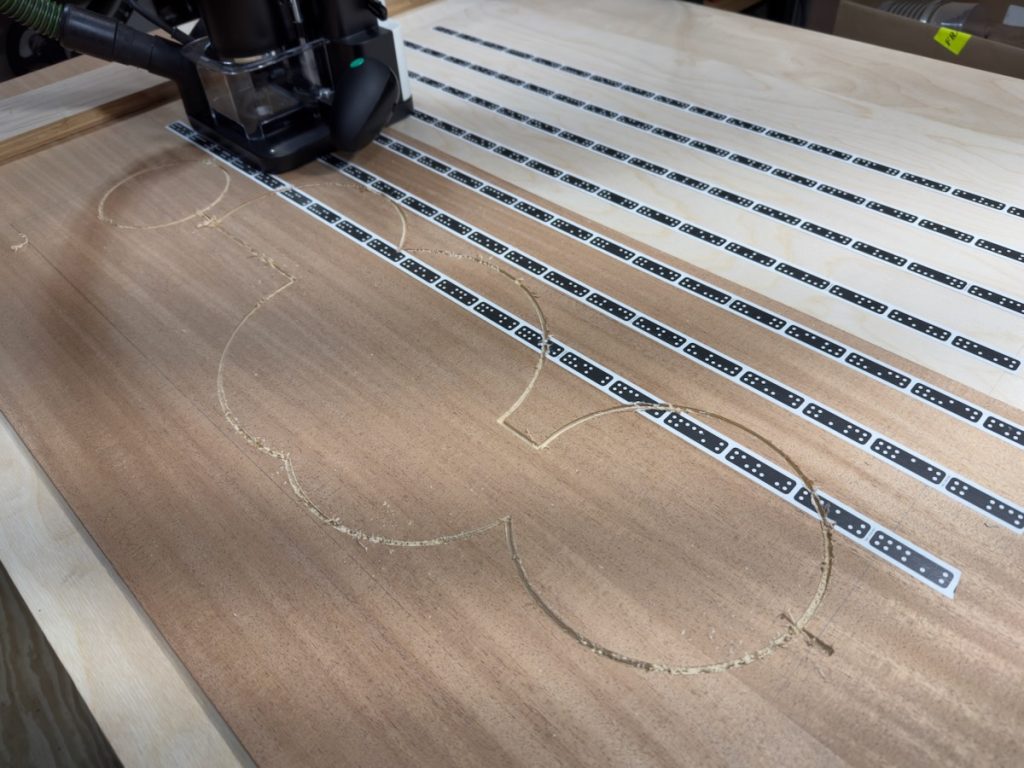
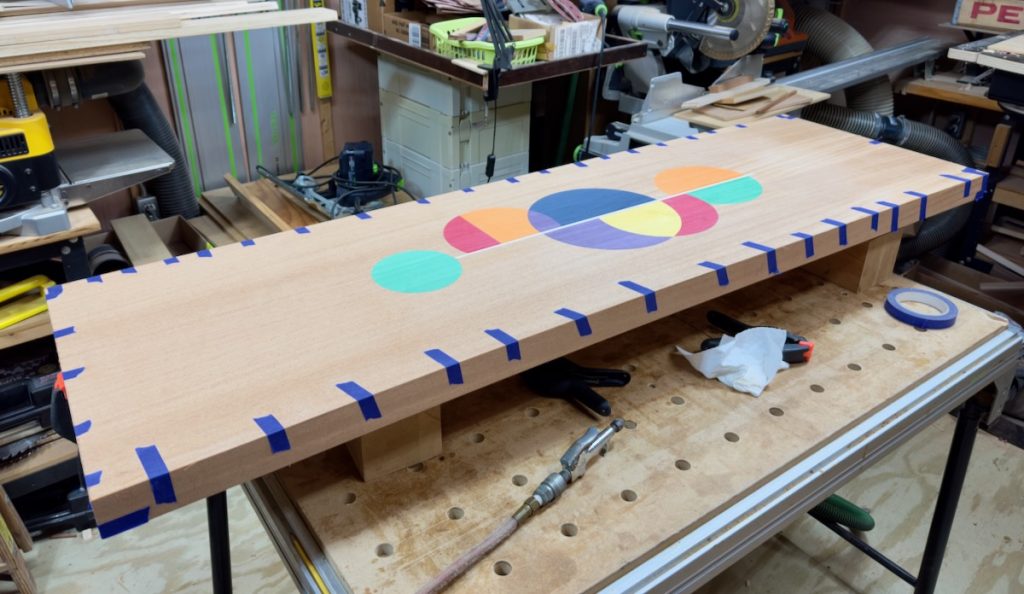
Making the cut in the tabletop for the individual wood shapes involved setting up the markers that the router used to determine cutter positioning. The markers extend slightly beyond the top and into the workpiece. This allows the router to determine its position with an accuracy of 0.001″. Pretty amazing!
Table outline for inlay. The design is uploaded into the Origin router. Special marker tape is laid out on and above the workpiece to allow for accurate tool path positioning. Everything is held in place underneath by double-sided tape.
The workpiece is secured to a panel underneath it using double-sided tape. The markers mustn’t move relative to the workplace, so care must be taken to ensure this with the tape and how the markers are laid out. Otherwise, the router displays an error message that the scan is unacceptable. However, once placed, it is accurate and, even more importantly, completely repeatable.
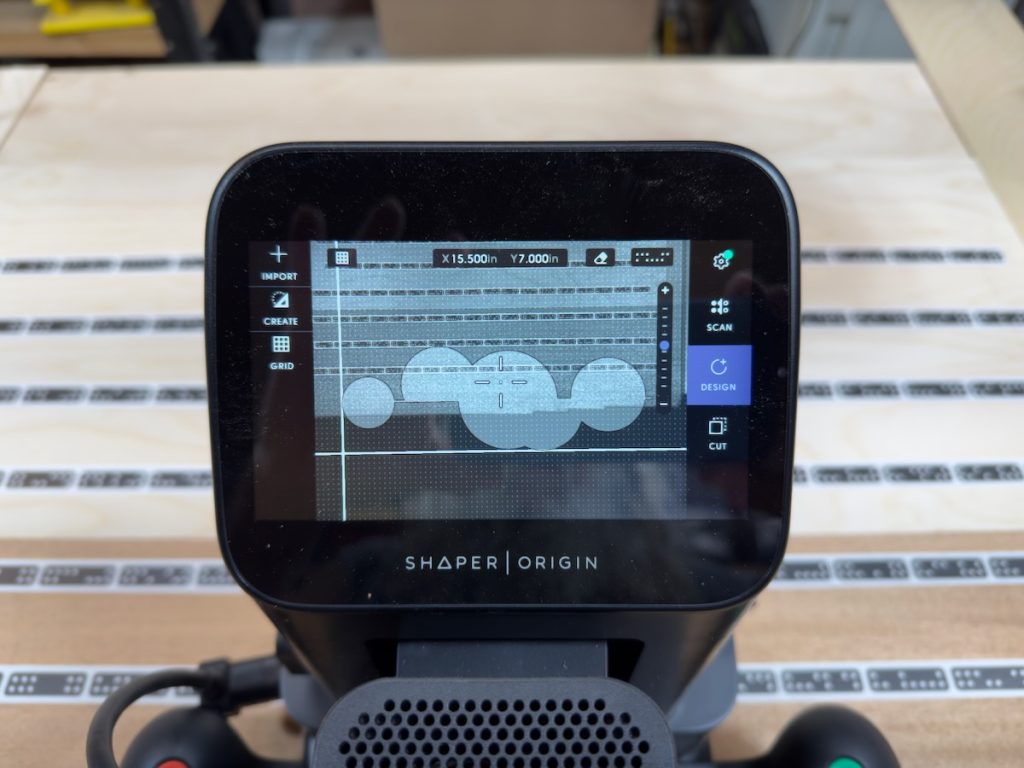
Closeup showing the path. The path can be accurately placed on a grid. The grid is determined by a simple three-point setup to produce the x and y axis seen. Once scanned, the markers are remembered so the unit can be powered off and on and reproduce an accurate cut. It is a very well-thought-out device!Routed outline. The pieces are held in place by double-sided tape. Routing slightly into the underlying panel produces a remarkablely clean edge.Final outline after removed from the backing panel.
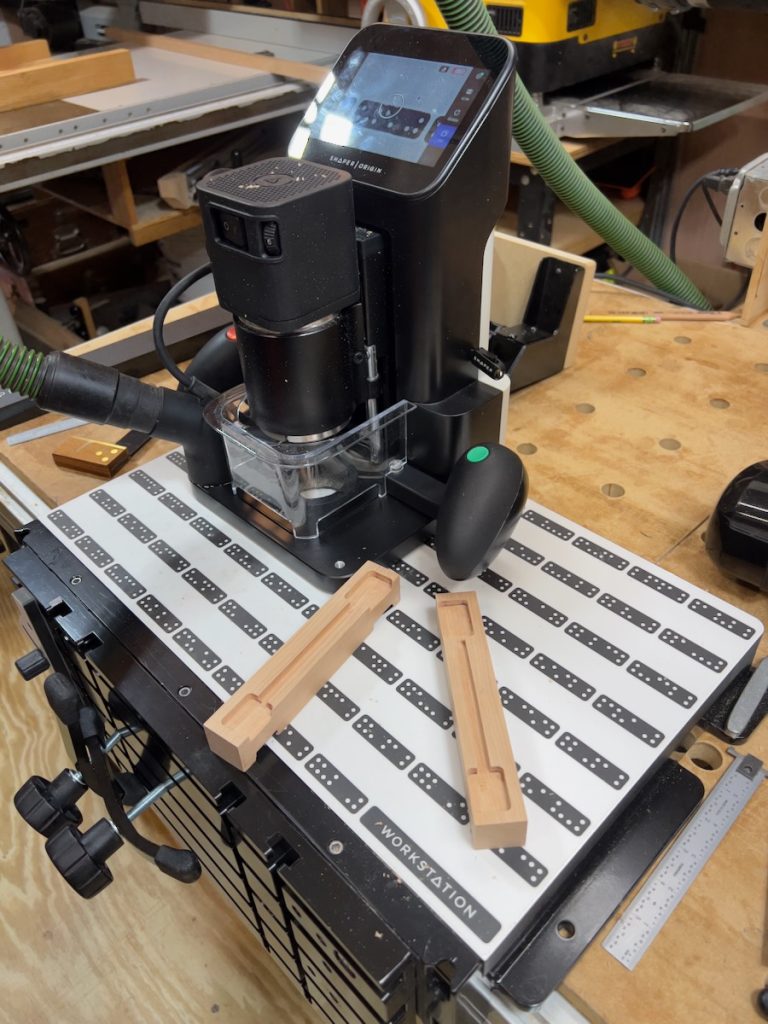
The next step is to cut and fit the individual pieces. They are vacuum glued to the 1/8″ plywood and cut using the Shaper Workstation. This accessory is handy for items up to about 12″ long and 5″ wide.
The Shaper Workstation allows you to route smaller pieces like this. It was used to cut all the shapes for the table.
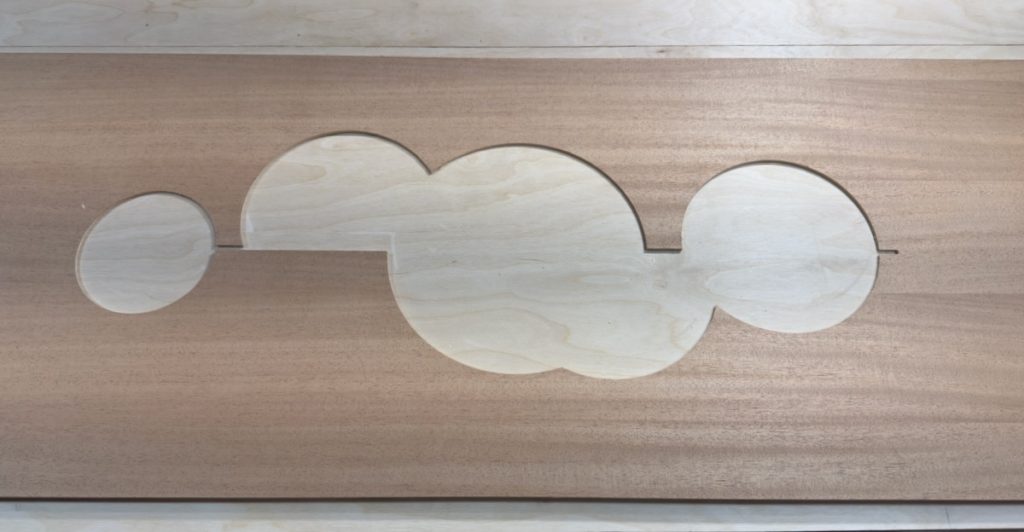
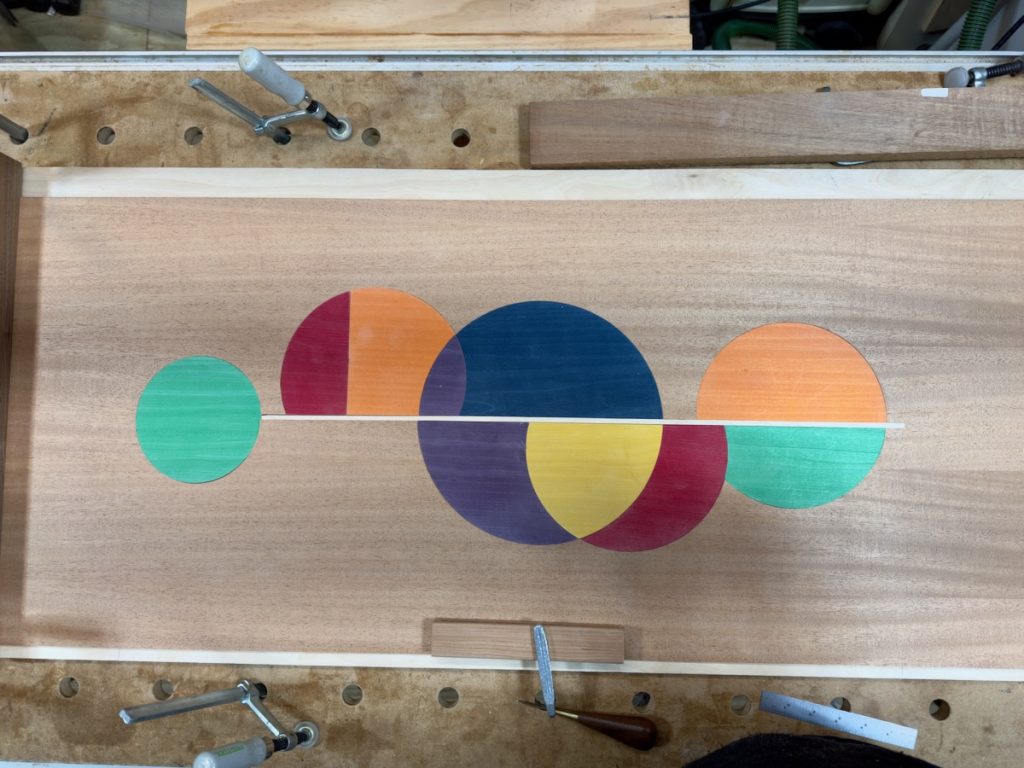
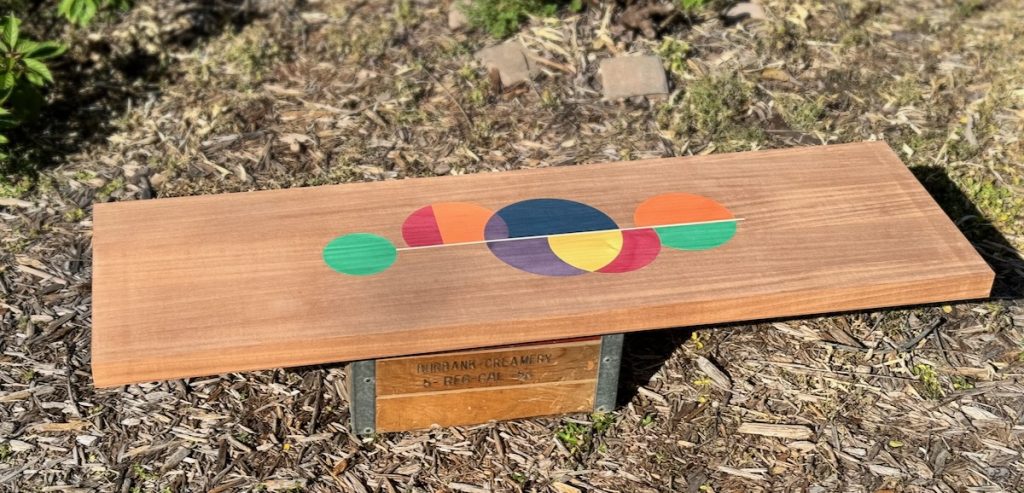
All the shape pieces were cut and fit into the panel. A solid strip of hard maple is placed in the middle. About 1 hour of sanding was needed to fit all the pieces in place smoothly. It went smoother than I expected.
All pieces fit into place with about 1 hour of sanding.
All the shapes were then glued to form the tabletop.
The shapes are carefully held in place. All the veneer-plywood shapes and the table top are vacuum glued onto a 1/2″ piece of plywood.
The final step before finishing was to add the sides. I wanted to ‘bookmatch’ the veneer, so I carefully cut the side and end pieces in the initial layout so the grain patterns would match. These were vacuum glued to the 1/8″ plywood and then onto 1/2″ plywood underlayment. The final step was to carefully cut each edge at a 45-degree angle (mitered) so the veneers would meet at a 90-degree angle.
Mitered edges were carefully cut with a track saw. The baltic birch cuts amazingly well, and the edges are sharp.
The edges are carefully cut to meet and then glued to the sides using tape.
Bookmatched edges. The corners meet very well; I was confident it would look great once sanded and finished.
The edges meet remarkably well.
The edges are glued to the top using tape.
All the edges were glued to the top. The final step was to add a solid wood trim piece along the bottom and fit the underside with attachment points and a simple bottom panel of 1/4″ plywood. I carefully sanded all the panels up to 220 grit sandpaper.
Sanded and ready for finishing!
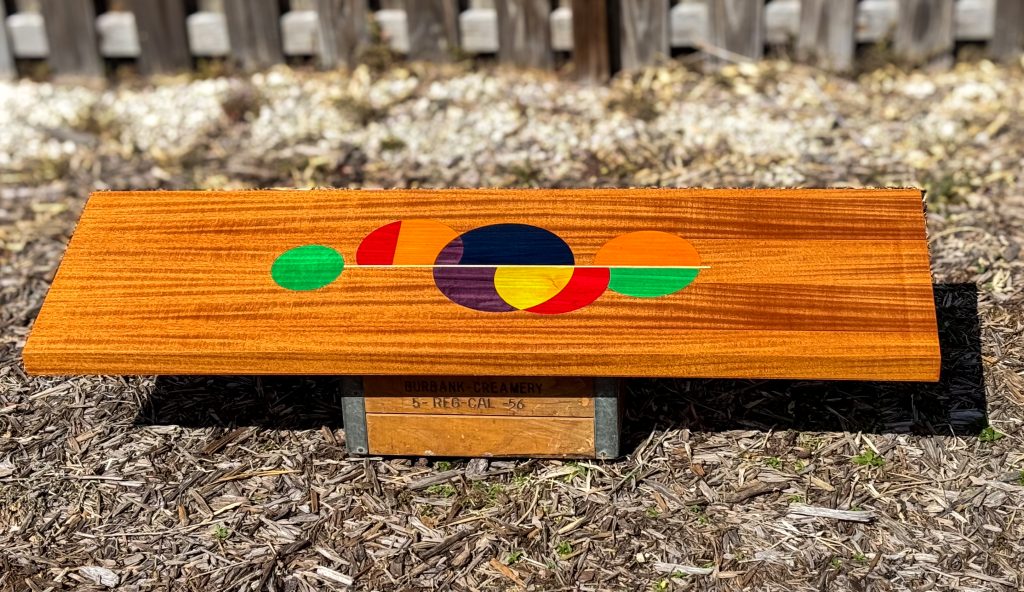
I searched for and used a new finish when I finished my high-top table. It is called Rubio Monocoat and is a ‘Silicon Valley’ grade finish purporting a molecular wood bonding, so toxic fumes and similar cool stuff. I have been very impressed with how it has held up. They also recently introduced a final ‘sheen’ costing, which I used. The results were simply stunning!
Finished with Rubio Monocoat clear coat followed by a sheen coat. Durable and simply stunning! The wood grain looks different depending on how you view it. Simply Wow.
I became interested in woodworking at a young age. I think it was as much about the tools as the process of designing and building something you could point to with varying degrees of pride!
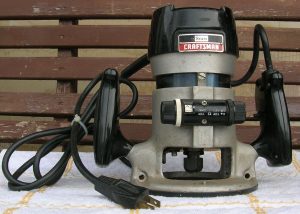
Sears router from the 1980s
The first new power tool I got when I started graduate school was a router. I had picked up a couple of second-hand tools like a skill saw and a drill. I figured I could start doing some incredible woodworking once I had a router.
Wrong! I quickly discovered there are few things you can do with a router until you have other essentials, like a table saw. But more importantly, I learned there are only specific ways to cut wood with a router. I eagerly tried to create a simple nameplate with my initials, only to discover it was impossible to do anything freehand with a router.
I eventually became proficient at many operations using templates, a router table, and different fixtures and jigs. I could do things with high accuracy, but it involved a lot of setup work. It was tough to do small, detailed work. I was looking for an easy way to do inlay work without investing in CNC machines. These could do accurate work but were large and relatively specialized.
I had a project in mind to replace the top of the side table I built so many years ago in Colorado with a new one with a compass rose inlay. I had seen many examples of those done in wood over the years.
Then, one day, I noticed an ad for a new router showing up online. It is capable of precision-free hand routing using a camera system. I followed the ad to watch a video of a guy adding a compass rose inlay in the middle of the landing of a wood staircase. I pretty much bought it on the spot!
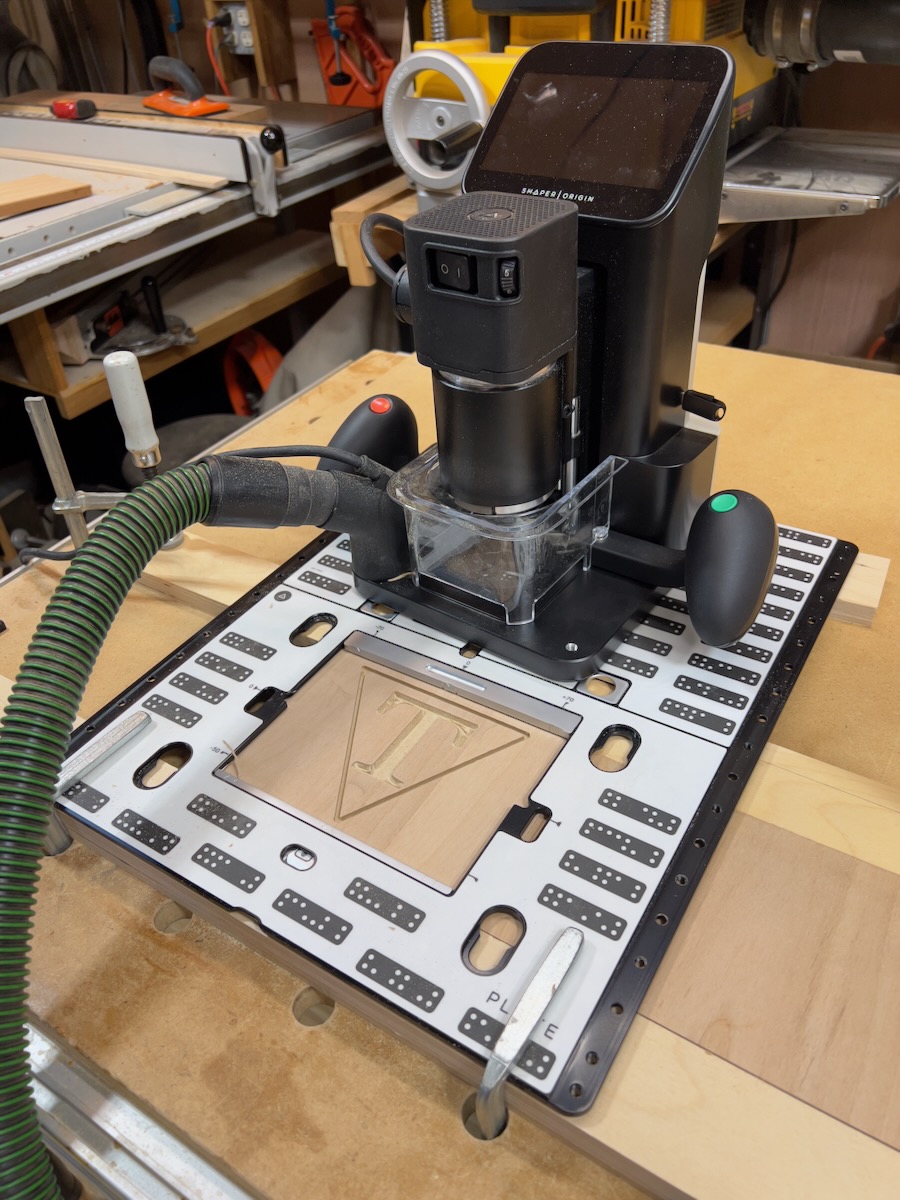
Essentially, a computer attached to a router with the ability to move the cutter head (parallel to the surface of the work) in real time. The operator follows a predefined path on the display while the camera looks at a pattern of user-applied graphical tape in the space above where the cut is being made. The motor is repositioned in real-time to ensure accuracy. The spindle instantly retracts if you move outside the track (roughly 1 inch in diameter).
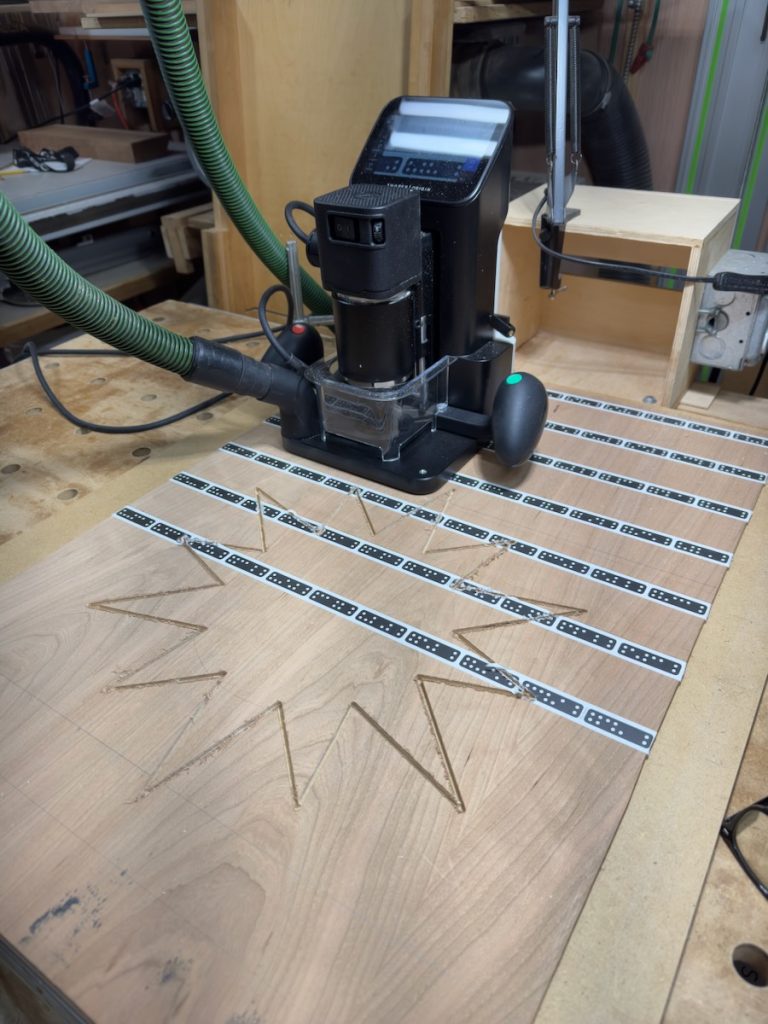
The router is used with a positioning plate. The domino-like shapes are read by the camera on the front of the router to position the cutter accurately.
The system comes with several workstations with pre-applied graphics for common operations on small pieces. Tape is applied directly to the work for larger work so that the larger cut area can be accurately made.
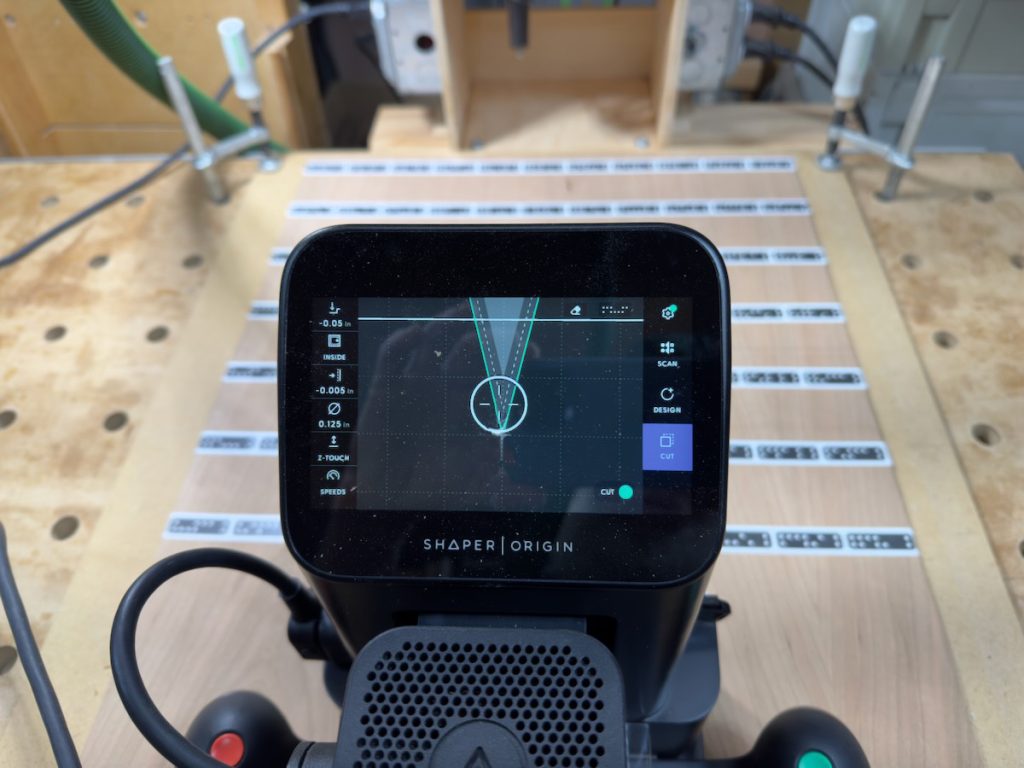
The display shows the cutting path with optical guides as you move the router over the work surface. You just need to stay inside the displayed ring and go in the right direction (as indicated by moving cut lines).
It is absolutely essential the workpiece can not move relative to the positioning tape once the unit has been set up. Two-sided tape is used to keep the piece from shifting while being cut. You specify the cut depth, press the cut button to lower the cutter into the work surface slowly, and then follow and route the path. Effective on-screen graphics help guide the cut. Several cuts at varying depths are made to ensure smooth operation. The unit is heavy enough with a large smooth base and is easy to control when following the path on the display.
The results of a cut on a larger surface. The graphics are applied using preprinted tape. The star-burst shape was cut out from the larger panel.
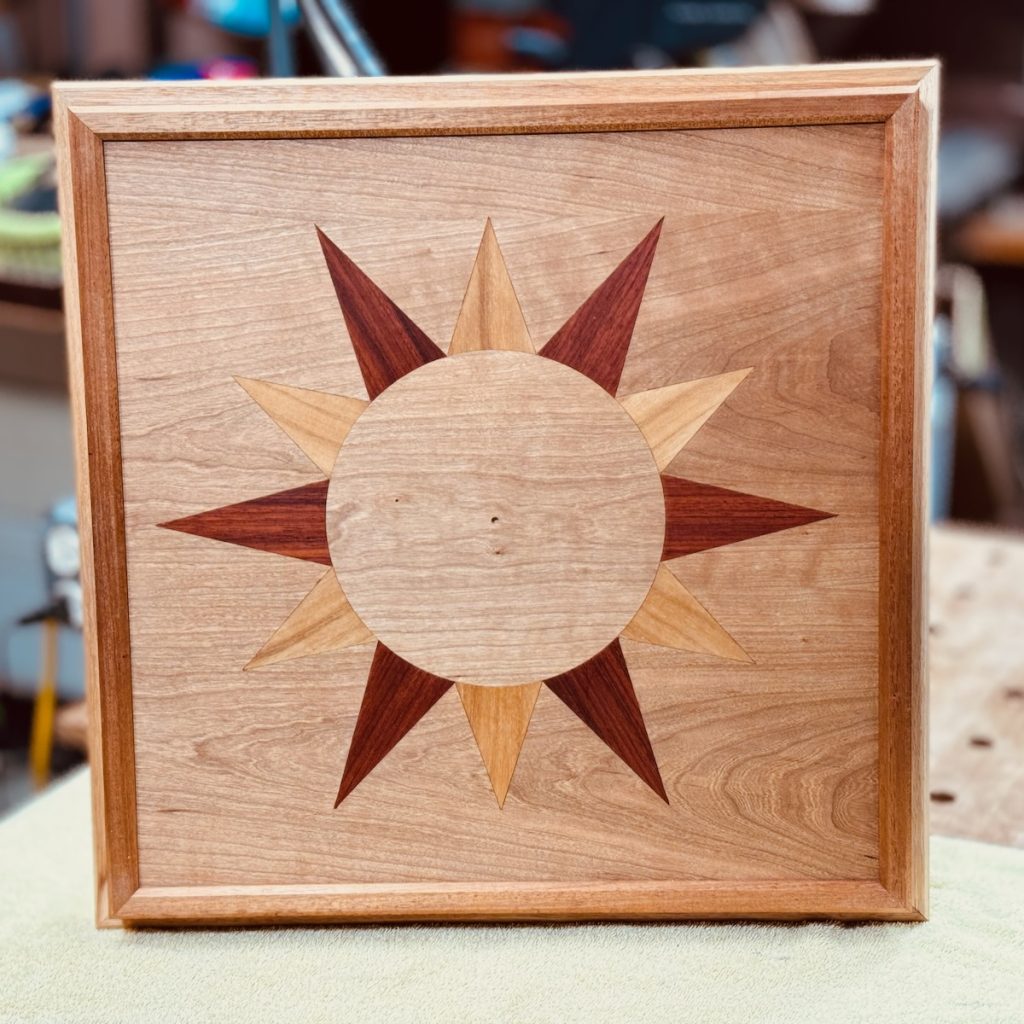
I am stunned at how accurate and repeatable the cuts are. Measurements can be entered accurately to one-thousandth of an inch. Offsets can be applied to provide for allowance on mating parts. Pieces can be cut and fit together like a jigsaw puzzle with stunning accuracy.
The triangular pieces were subsequently cut and fit in place with only a tiny amount of handwork on the sharp corners. The pieces fit astonishingly well!
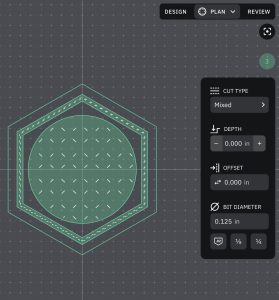
A web-based design tool can create tool paths for mortising and inlay work. It also can import AutoCAD files. I use AutoCAD to do my design work for my projects. Exporting design files and importing them to the tool was easy.
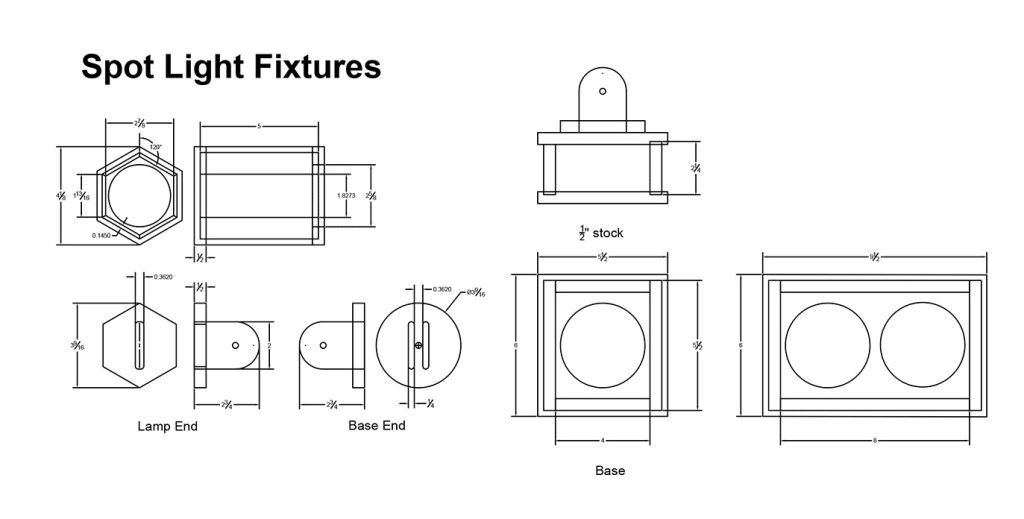
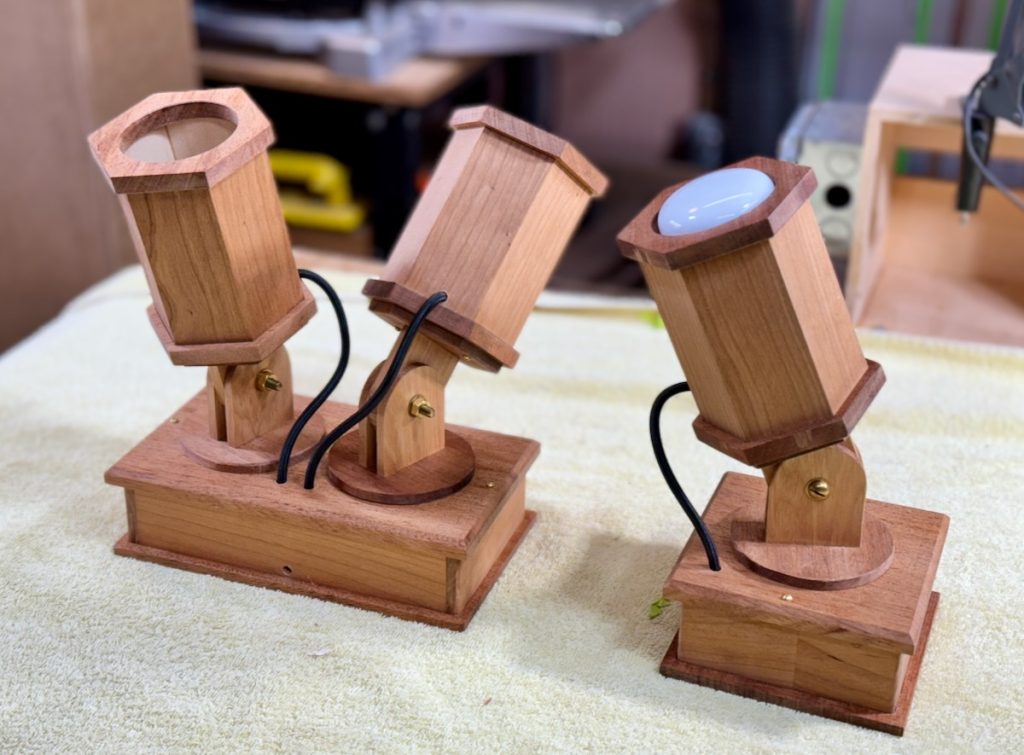
Spotlight fixture design in AutoCAD
Web-based tool to create and simulate cutting paths. Animation shows direction the tool moves. The center area is a pocket cut where the cutter head can be moved anywhere within the enclosed region.
Wood spotlights. I used the router to make the hexagonal shapes, the swivel pieces, and the lid and base of the boxes.
I would guess this will become a big hit. One of my favorite tool designers and manufacturers, Festool, from Germany, has already acquired the startup. I own several tools they made and have found them to be of exceptional quality and reliability and have held well over the years.
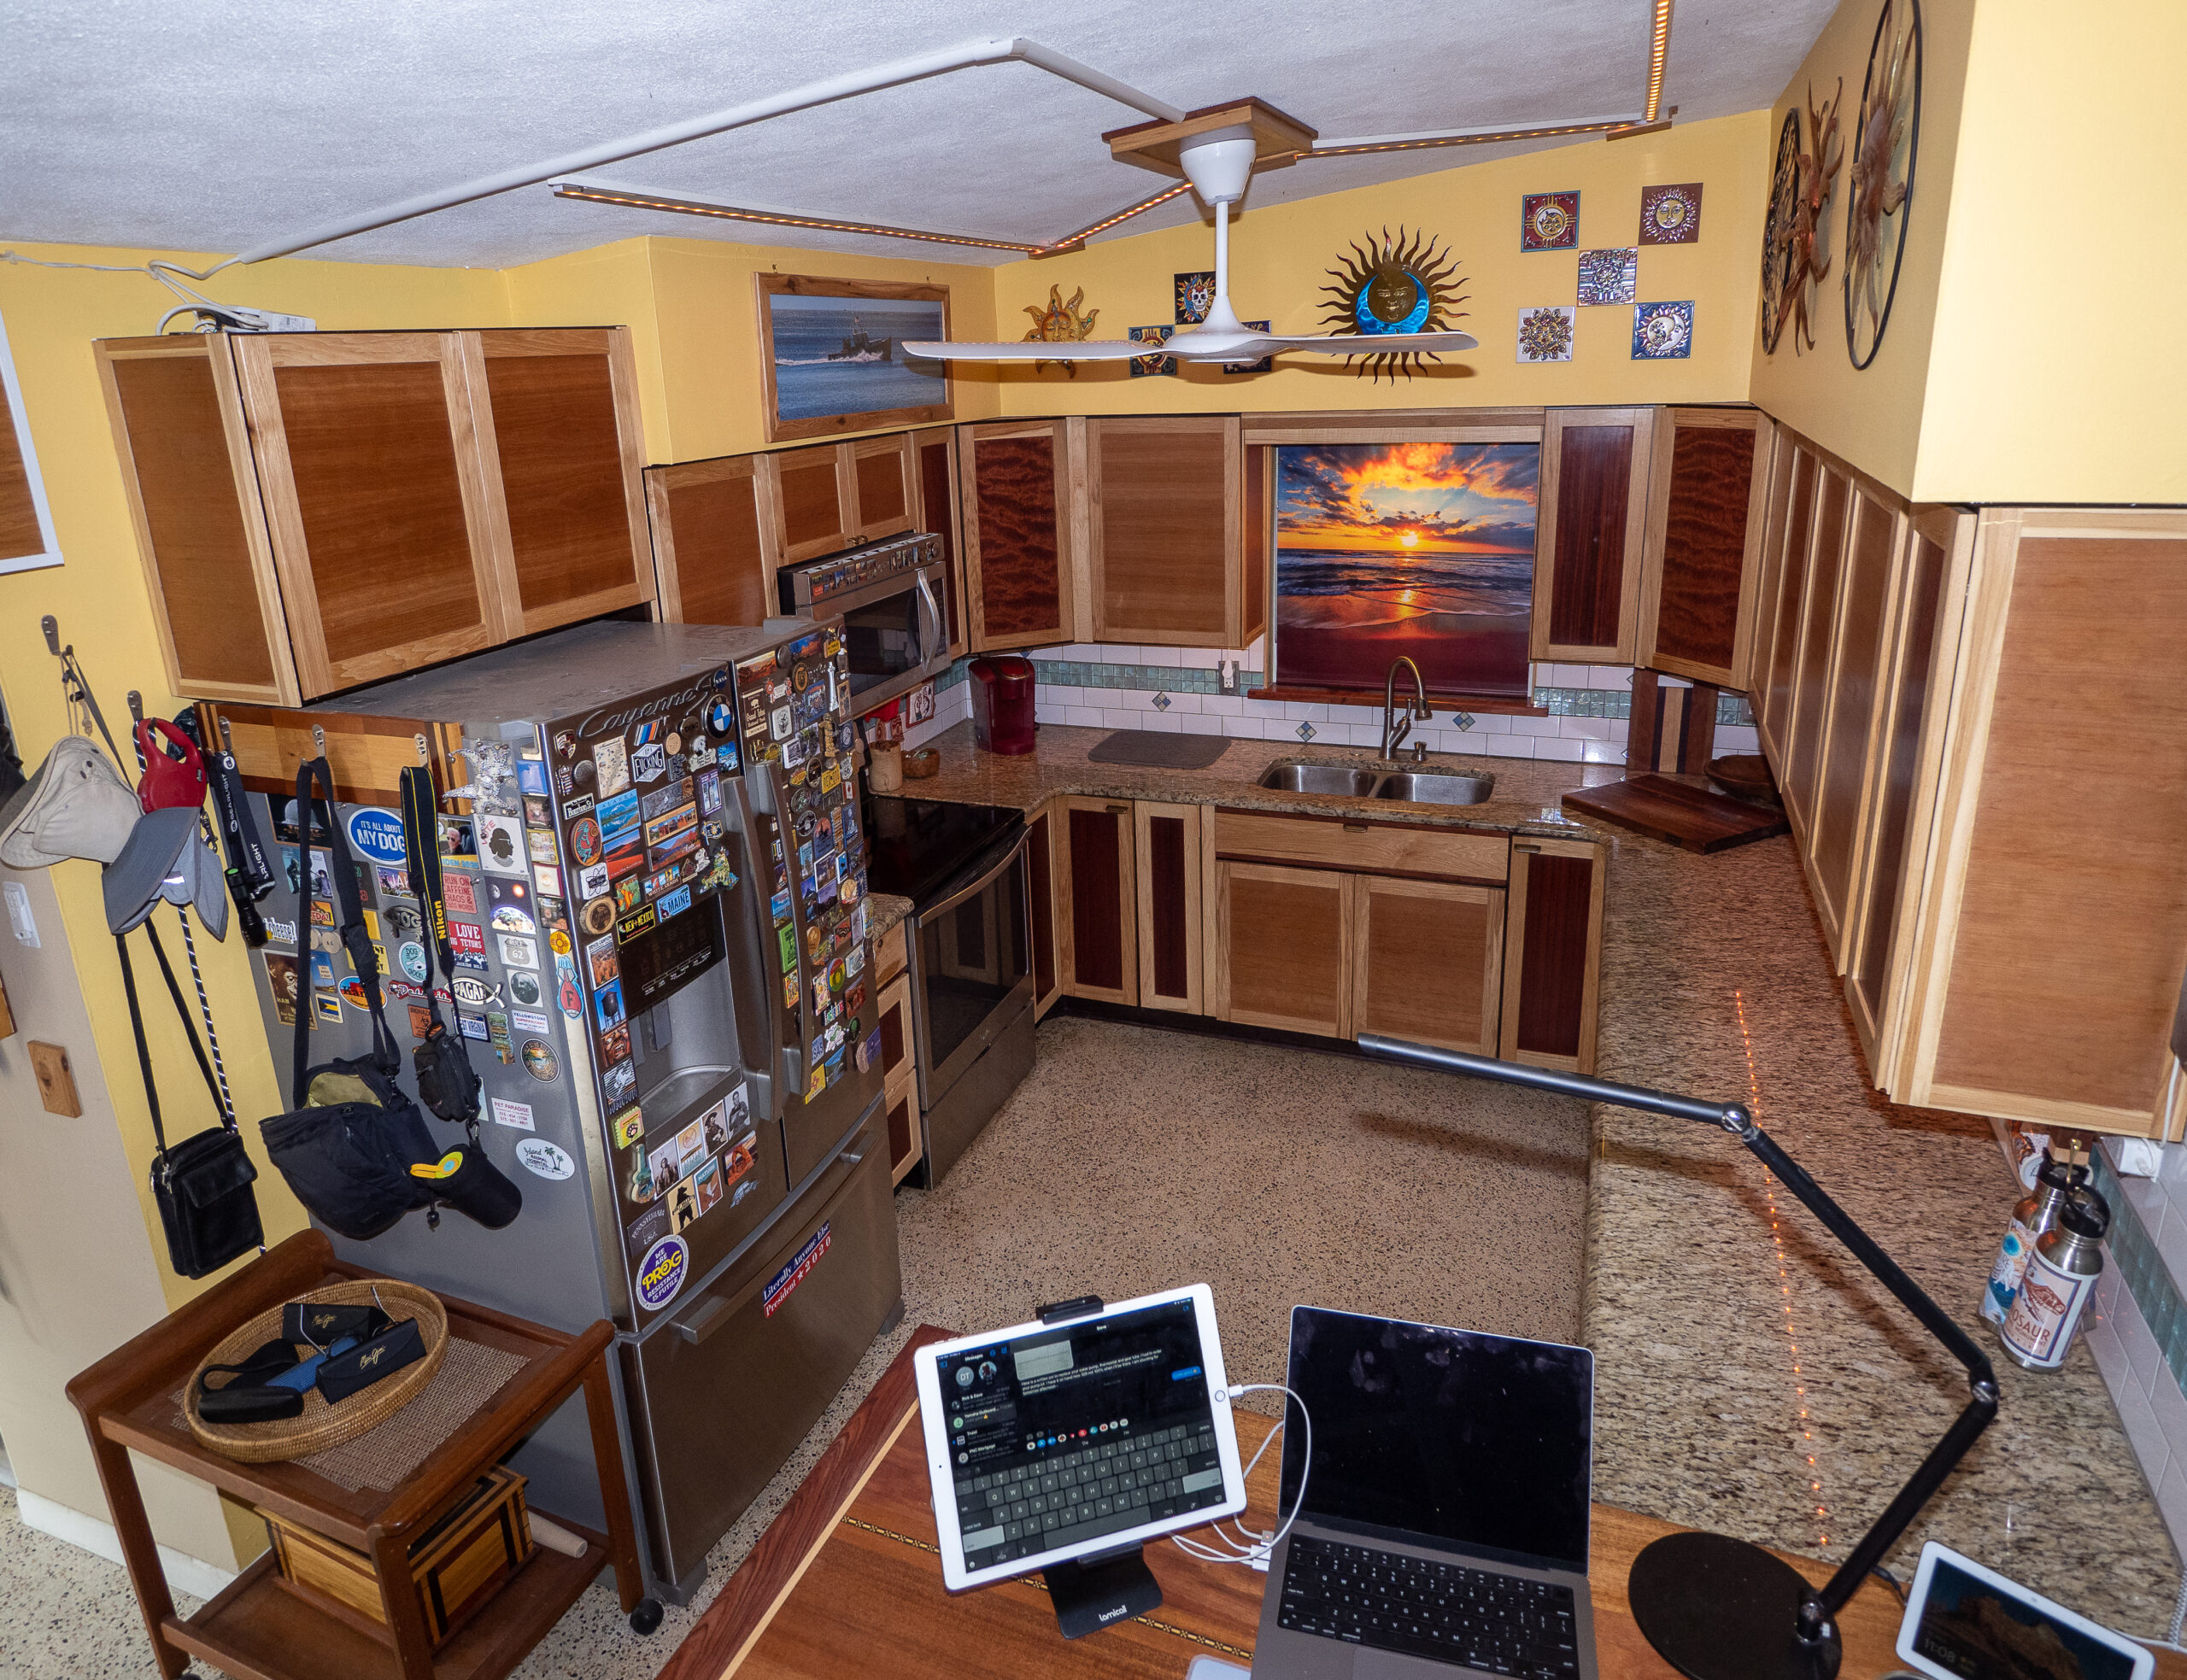
After my knee diagnosis last year, I decided to move forward with renovating the kitchen.
I replaced 33 doors using hickory frames and different veneers for the panels (cherry, bubinga, padauk). I used bubinga, cherry, and hickory for the other trim pieces. I trimmed the sink area and added a printed roller blind with a sunset scene. I upgraded all the lighting and replaced and added trim to the lighting. I added a cup holder for my coffee mug collection. I replaced the granite countertop and large cabinet with a high-top table previously featured. I finished all the cabinet ends and where the bar was removed. Finally, I painted the kitchen and added some new artwork.
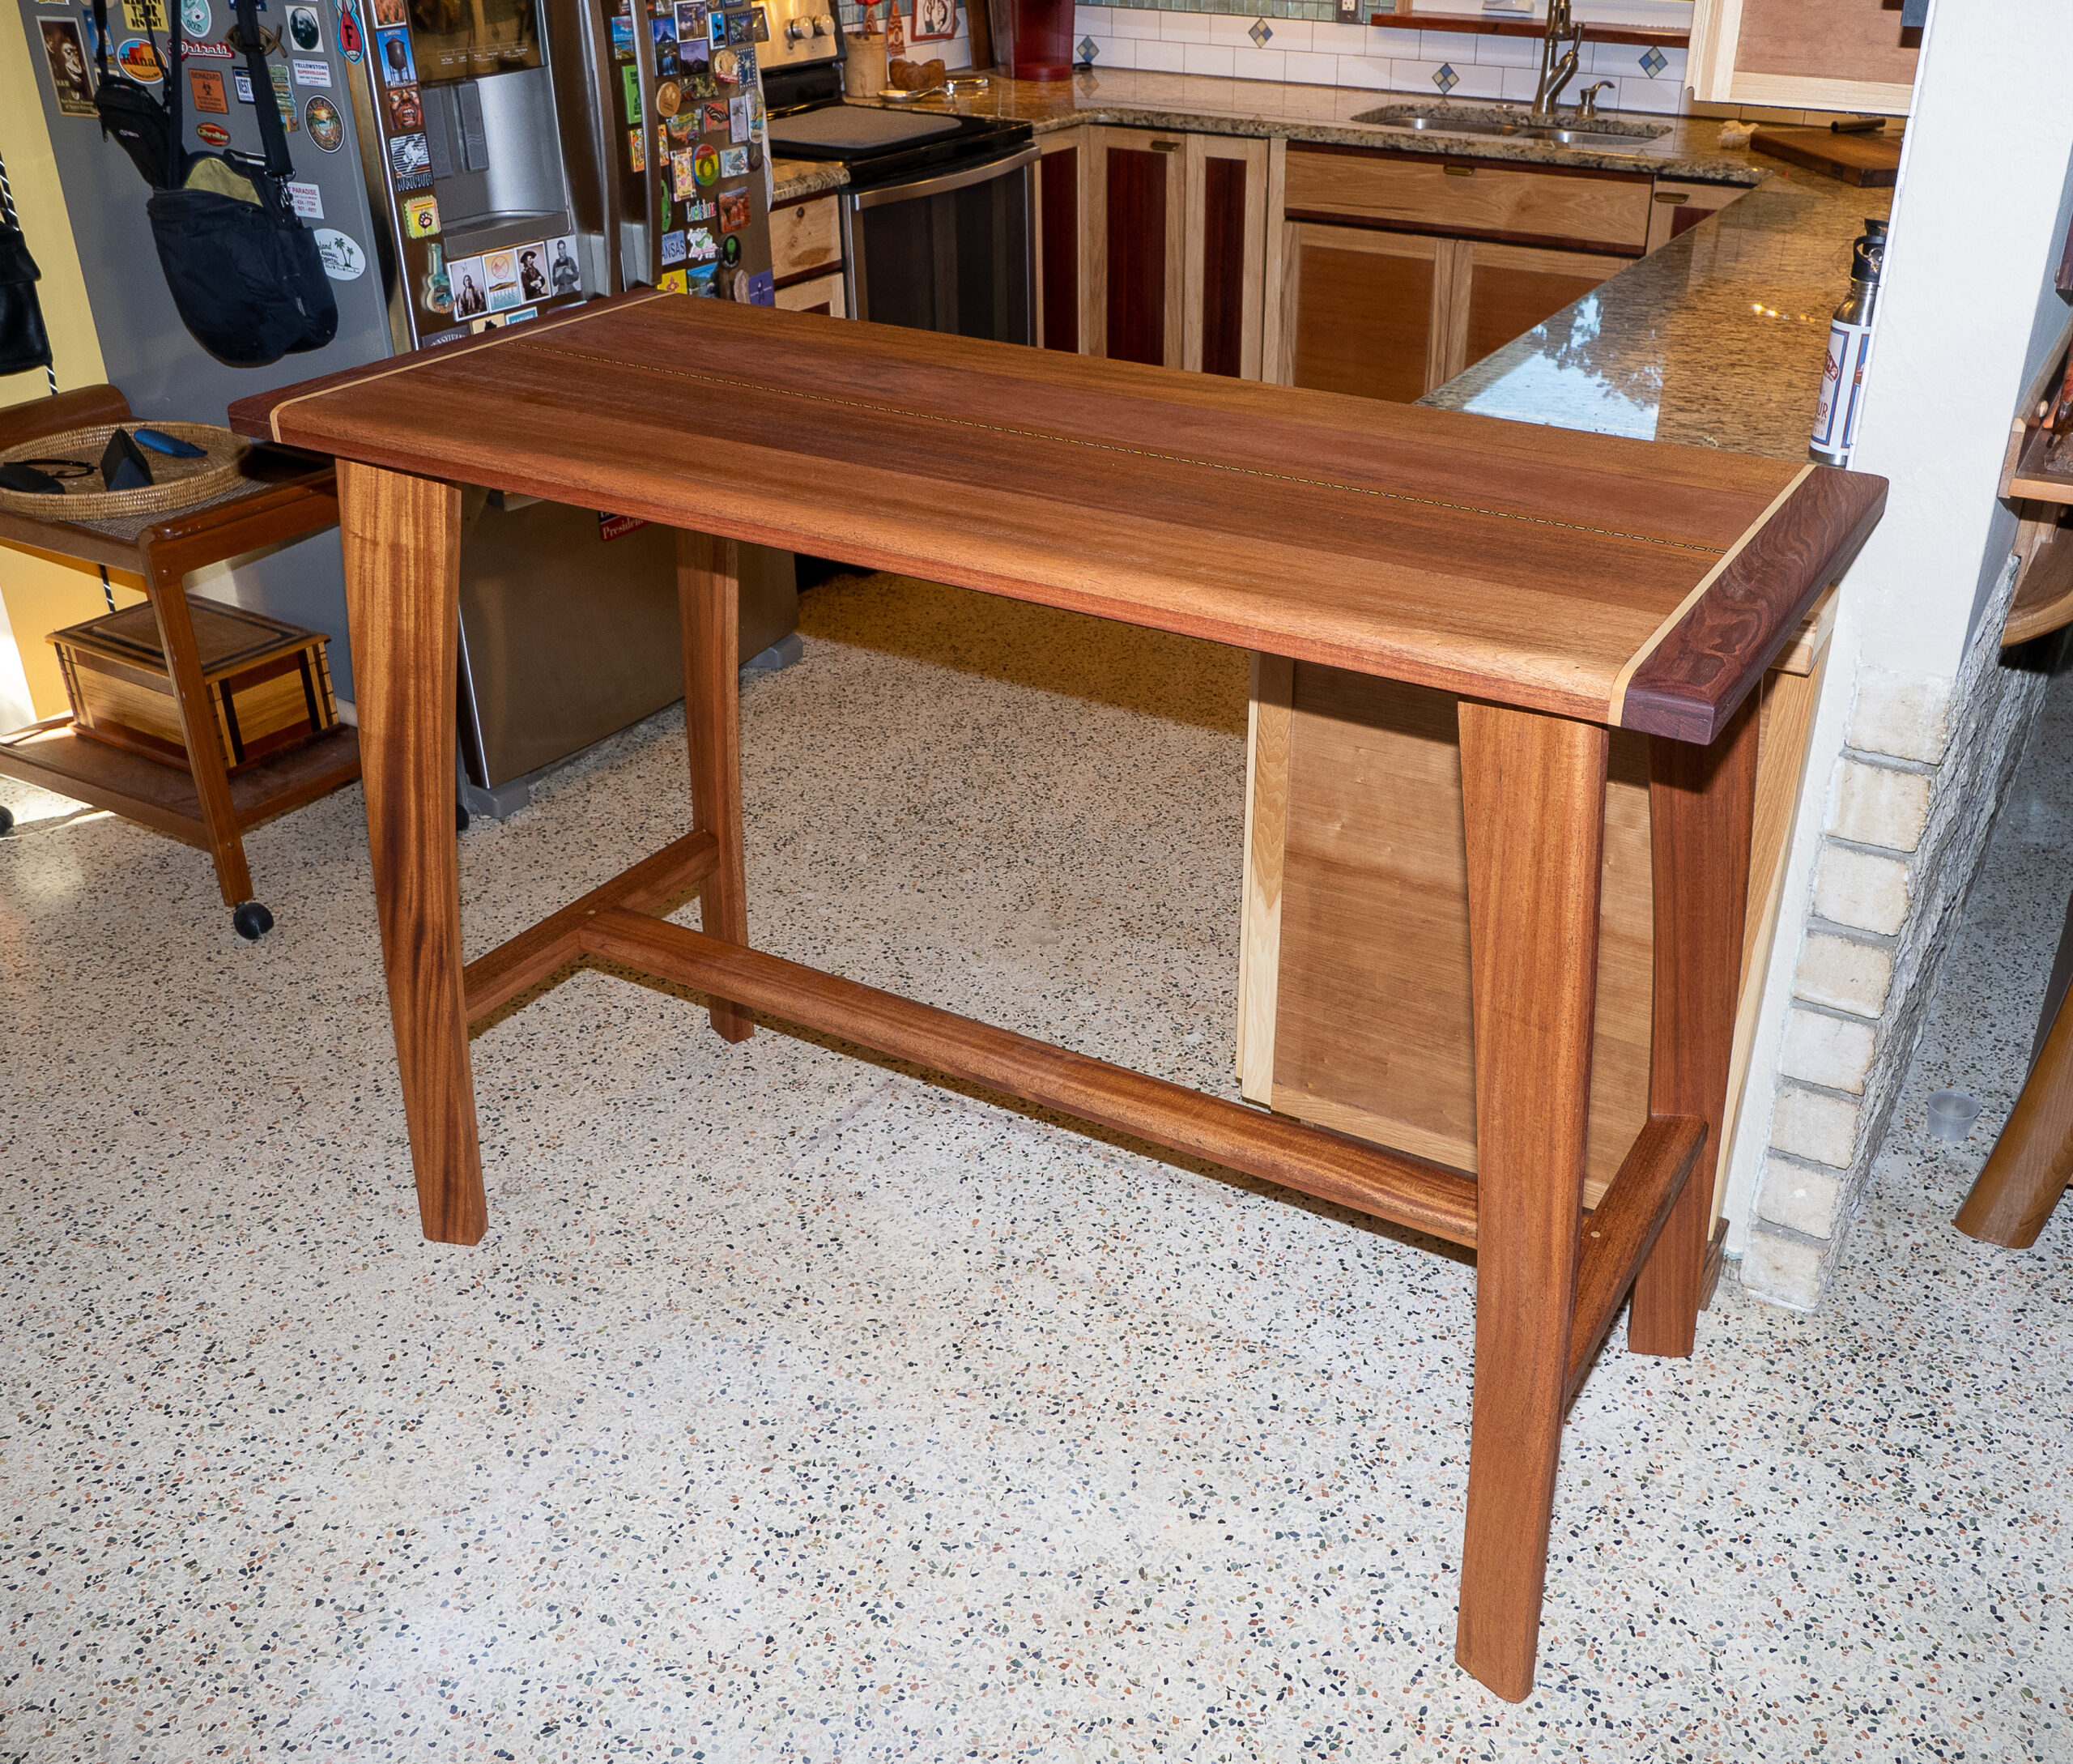
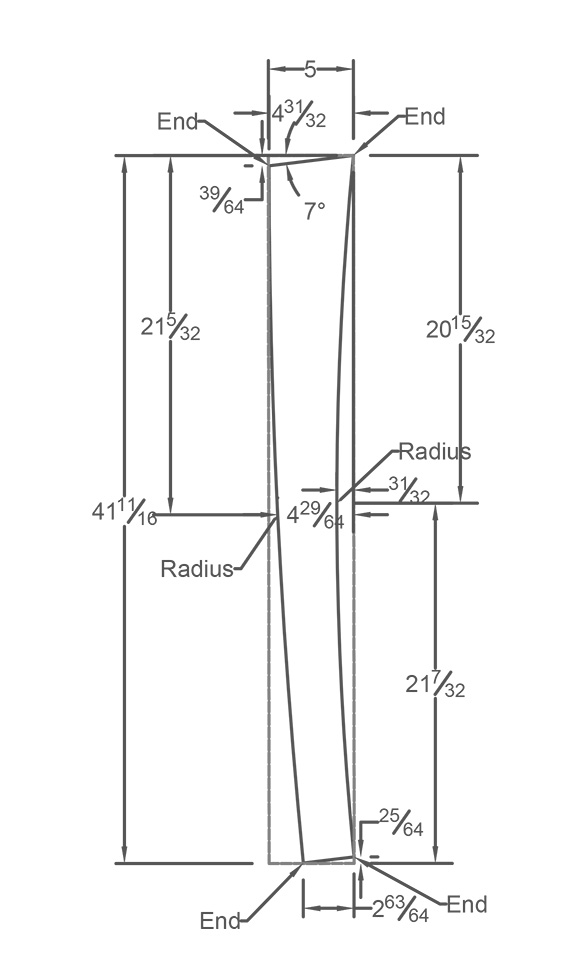
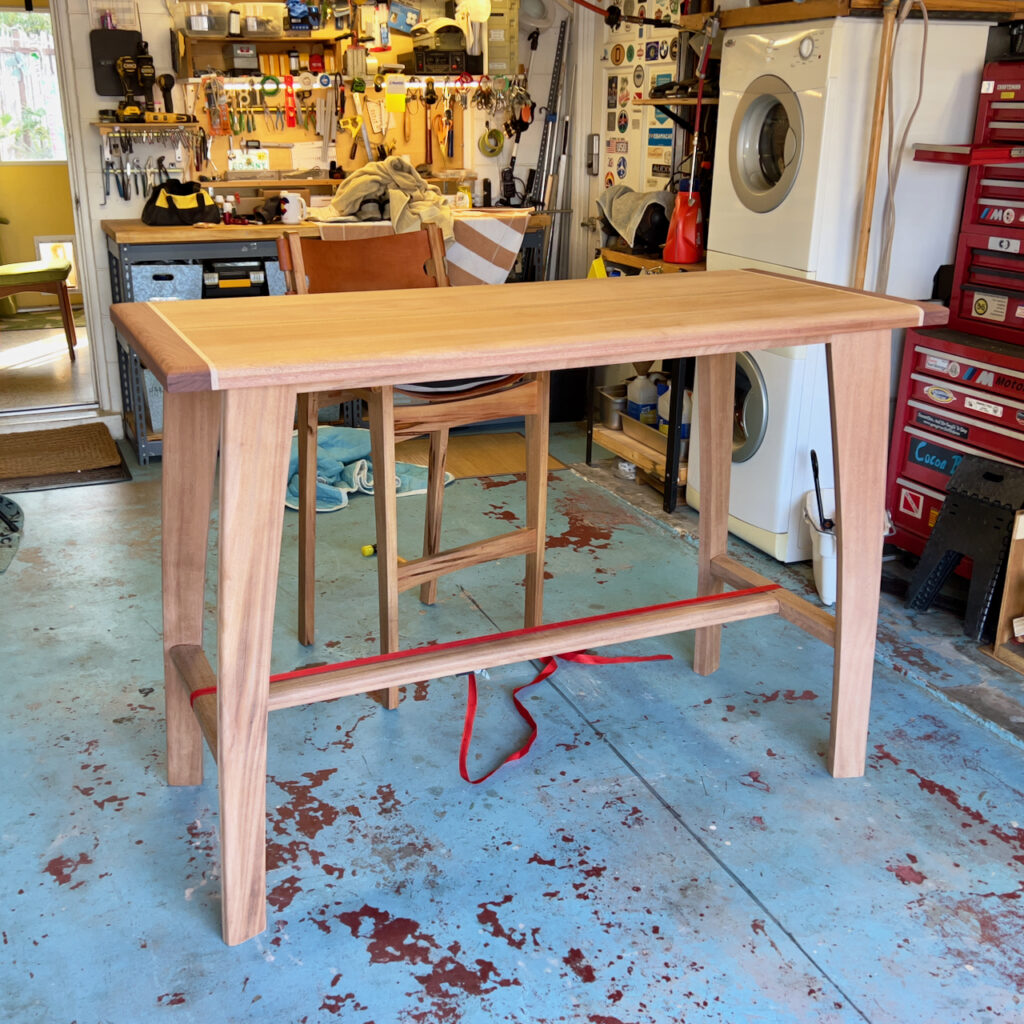
I designed and built this table to replace the bar I had in the kitchen area. The table leg design and construction was my design based on other projects I had done. I used AutoCAD to design and lay out the legs. the stretcher pieces on the bottom were fit in by hand and involved some compound cuts. One of my more ambitious builds. Very happy with the way it came out!
The leg shape was created with two radii resulting in a curved taper. I used AutoCAD to determine the angle to tilt the legs and rotate them outward. The bottom of the legs is just slightly smaller than the table’s footprint.
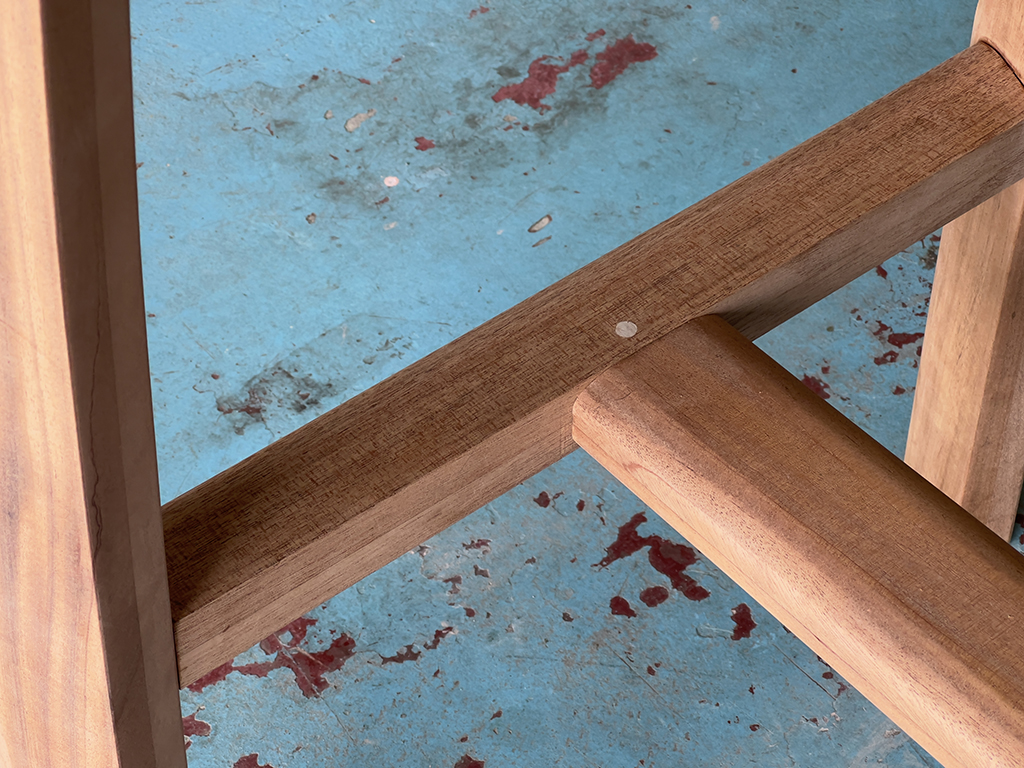
The detail shows leg attachments to the table and stretcher between the two legs. The legs are held in place by bolts. the upper stretcher was fit with a compound cut. Both stretchers are held in place with mortise and tenon joints.
The long stretcher between the table assemblies is held in place with a mortise and tenon joint. The two stretchers are glued to the legs.
The stretcher between the two leg assemblies is held in place with a dowel
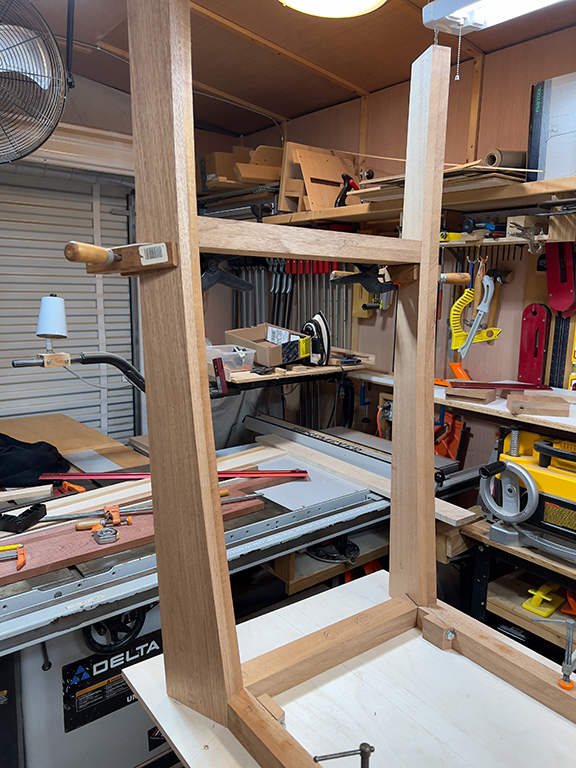
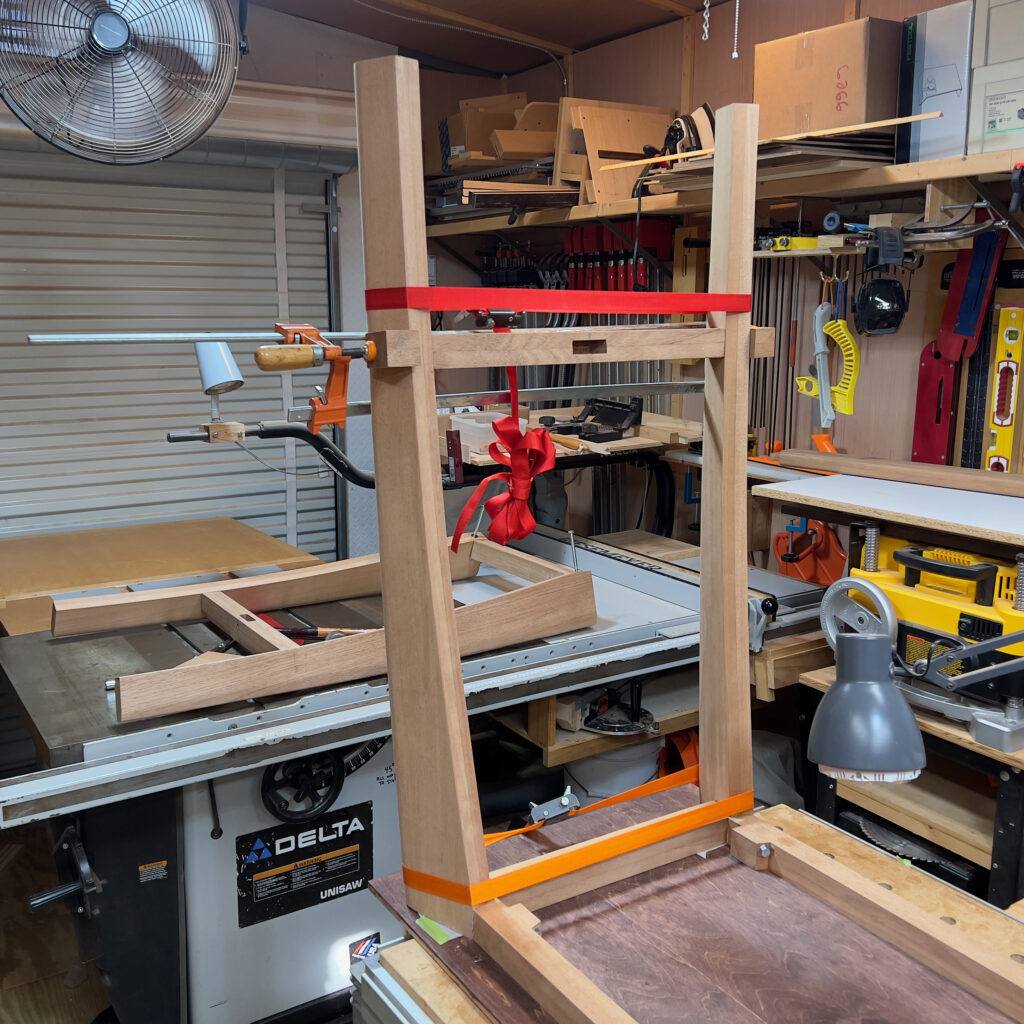
Final assembly before finishing. The table top uses bubinga and maple trim pieces with a wood banding strip running lengthwise down the middle.
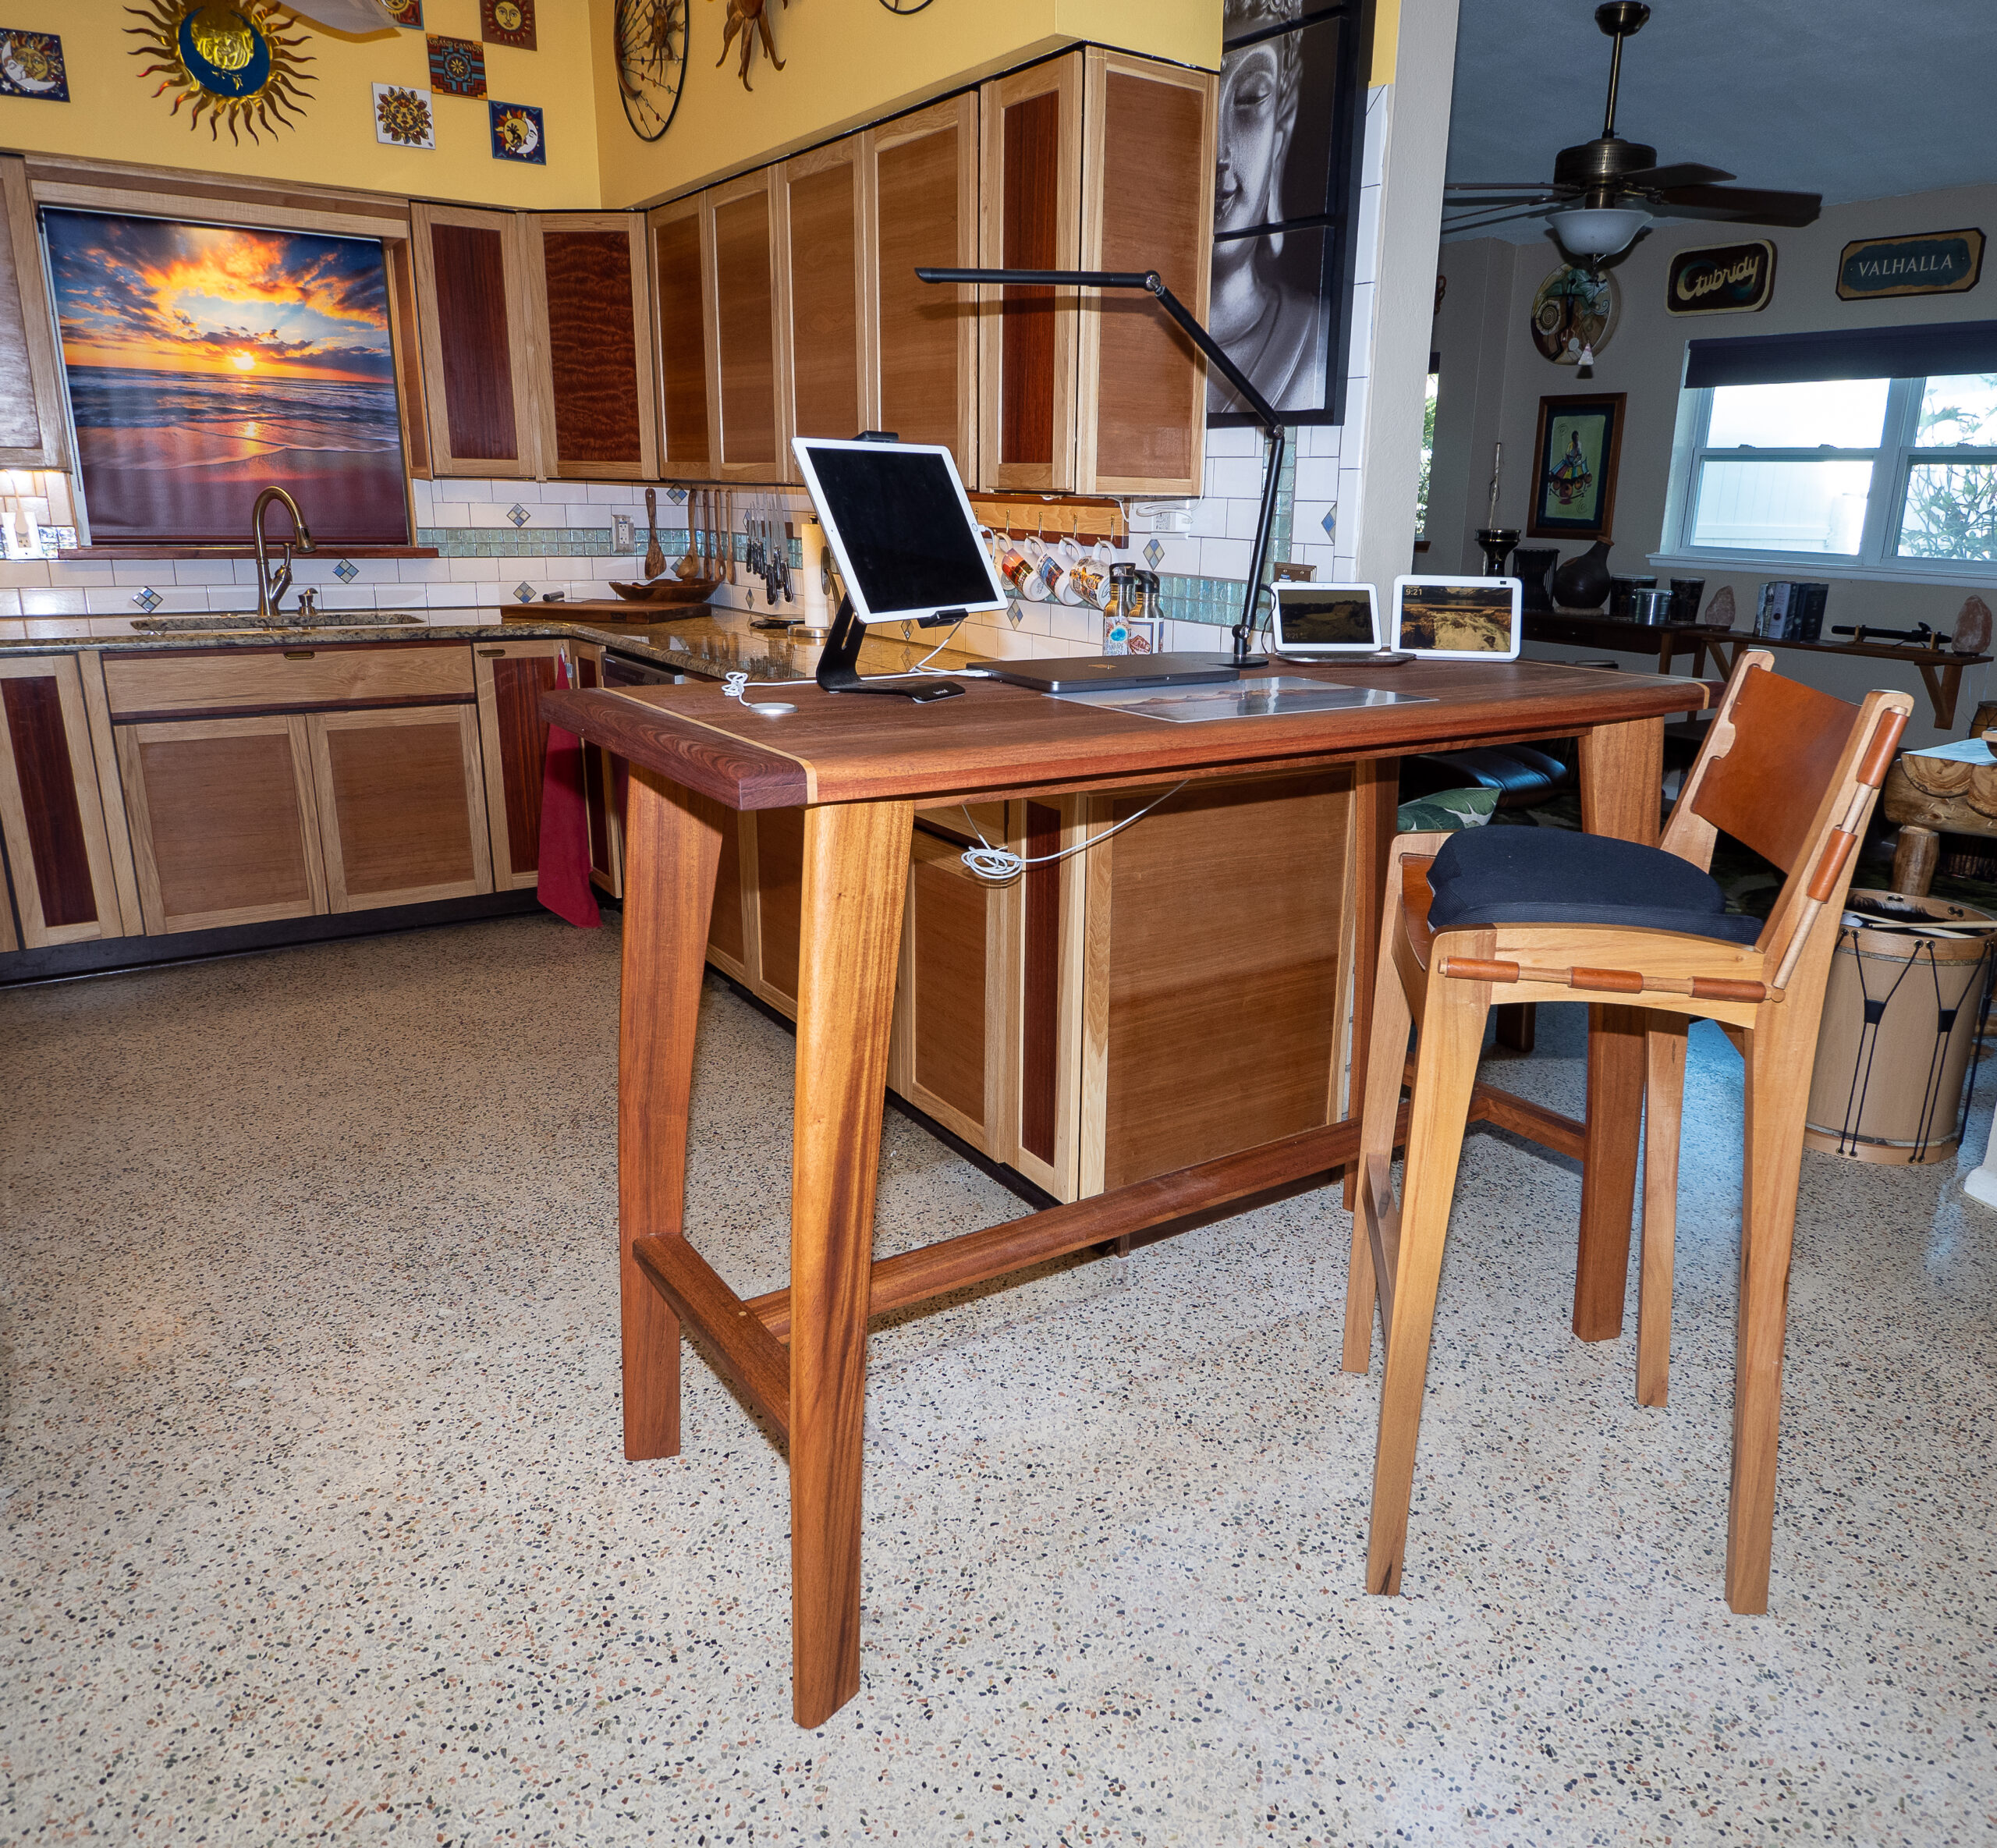
The table replaces the granite bar and cabinet. It opens the kitchen up better than I expected. My bar stool from an artisan in Argentina I got earlier looks excellent with it.
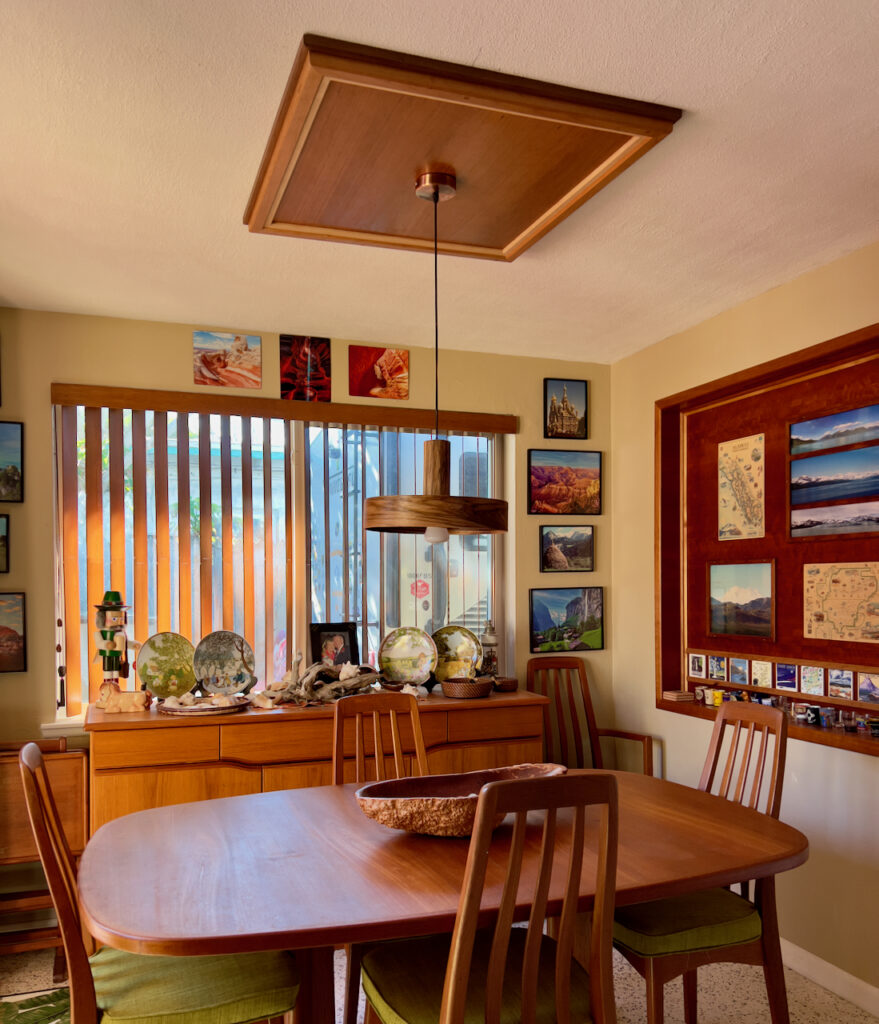
Dining Room Lamp
I replaced the dining room lamp shortly after moving in with a temporary fixture until I could find something nice! I finally found a unique wooden lamp by an artisan in Greece that fit my aesthetic. It is made from a mango wood veneer. I built a cherry, walnut, and maple ceiling panel similar to those in the bar area for the finishing touch. Very happy with how it came out.
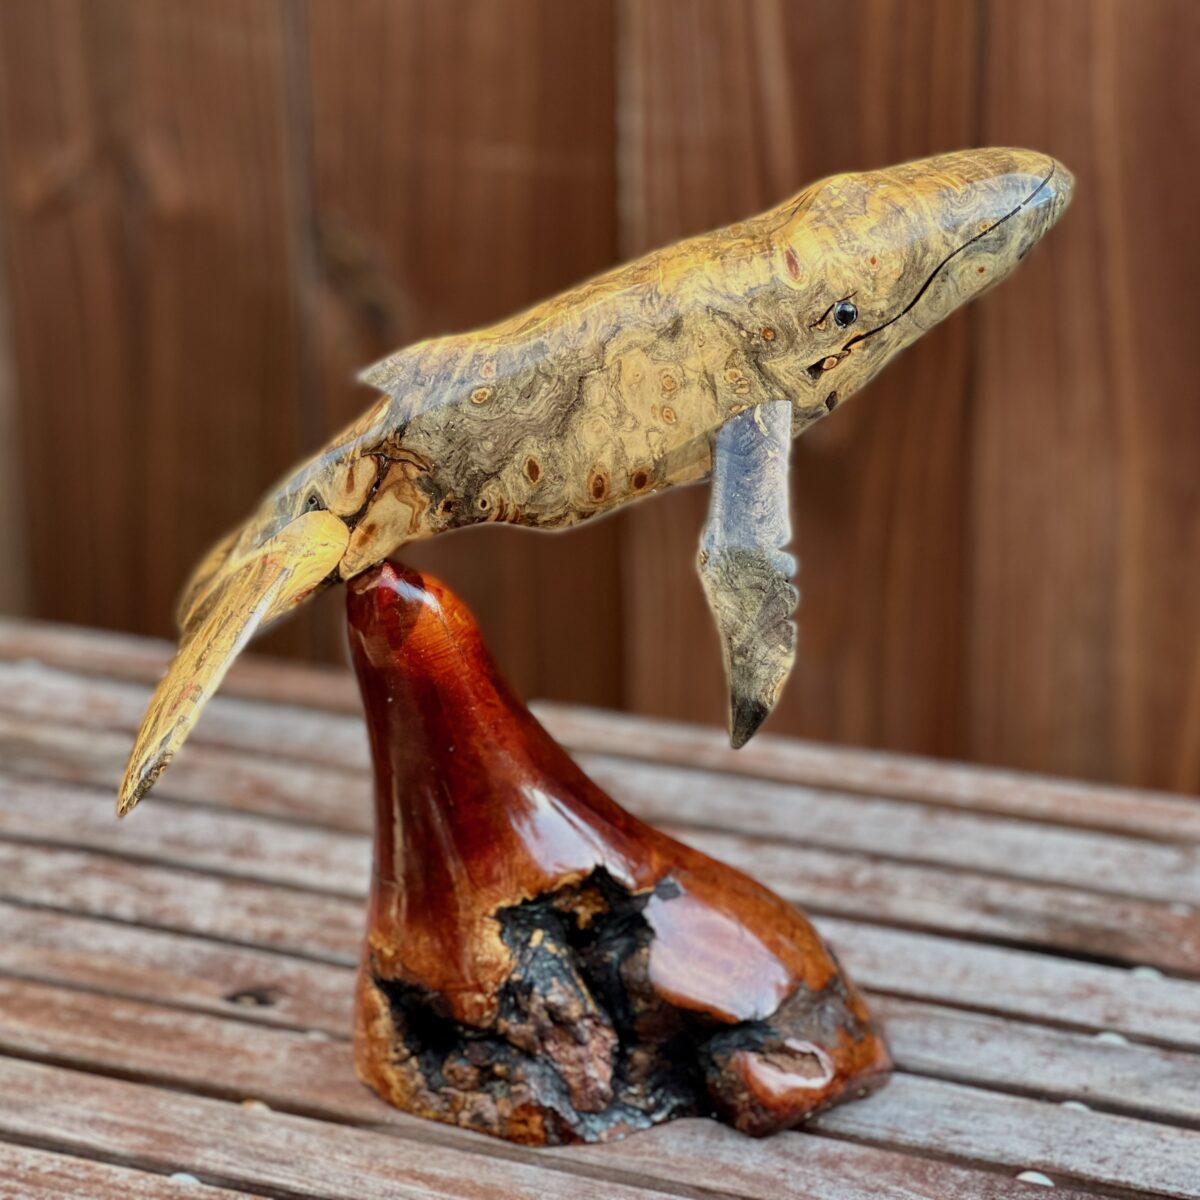
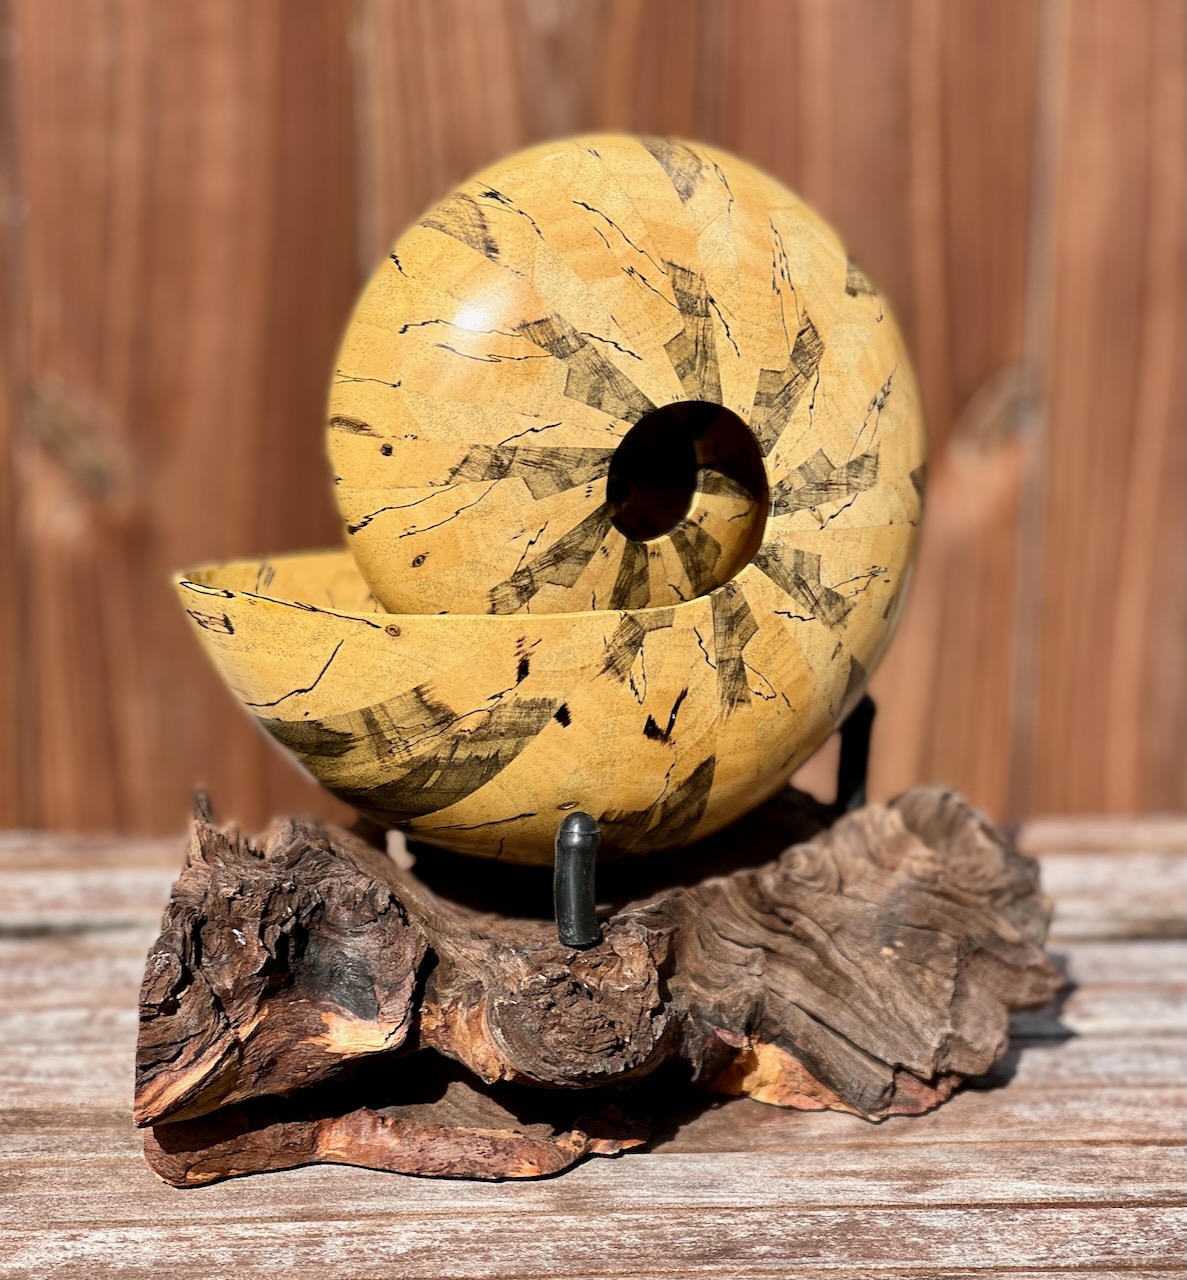
Cocoa Beach has hosted an art show over Thanksgiving for as long as I can remember. I always look for unique woodworking like this Nautilius shell made from spalted maple. You can check out the artist’s other work at Rustling Palms Studio.
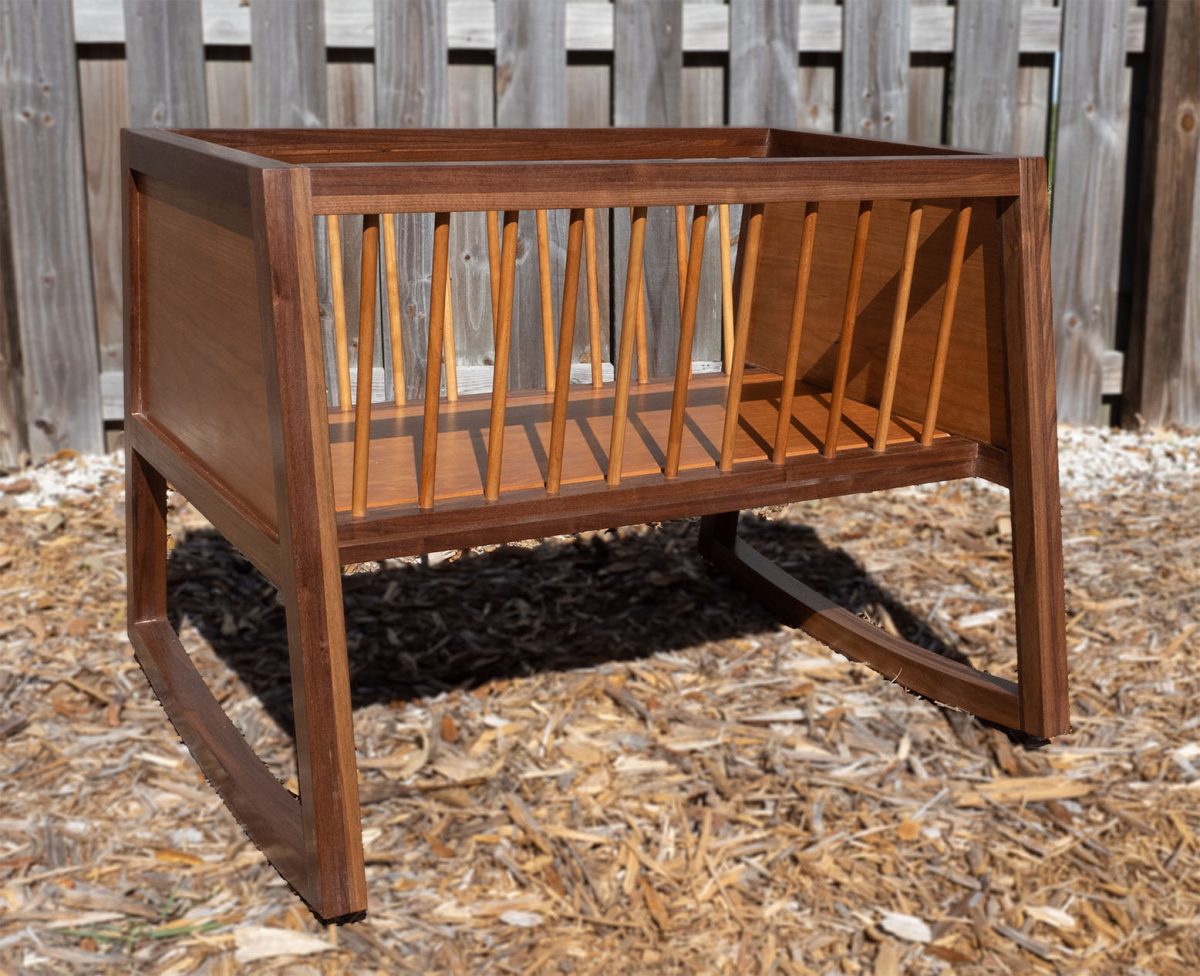
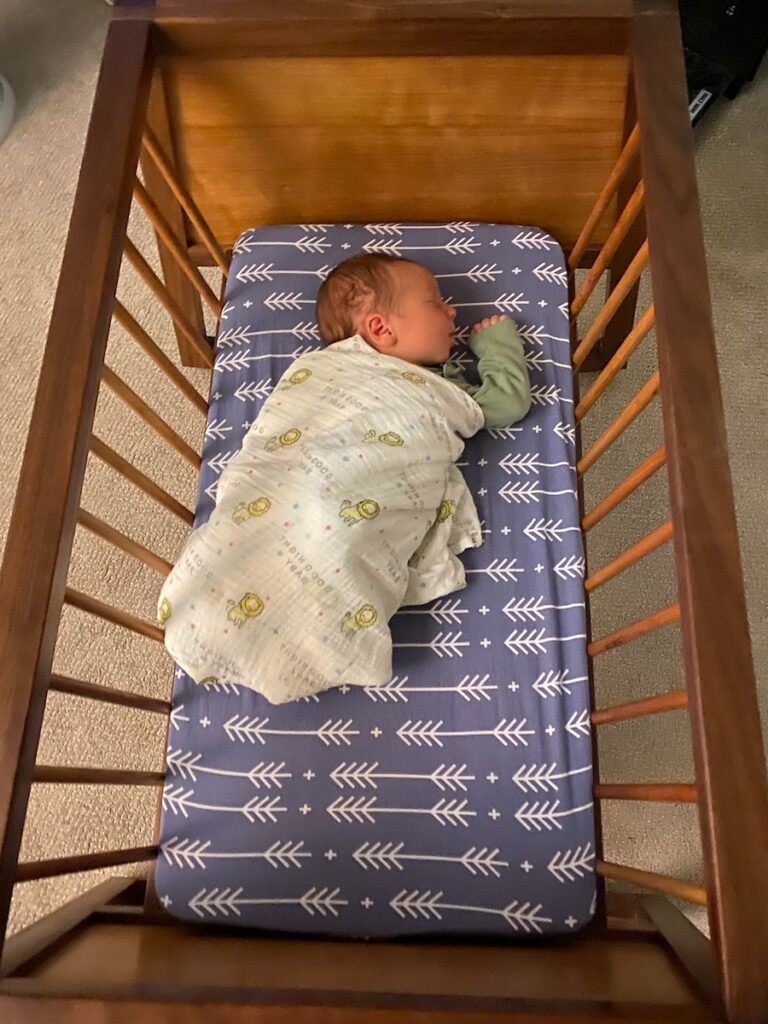
When Kari & Carl surprised me with the news they were expecting their first child (Baby Uno) they told me by asking if I would make a bassinet for them! Of course, I replied, and here is the result along with some pictures I took during the build. The build was fun and I expanded my skill set with the rocker legs and double mortise and tenon construction.
I found an excellent design on YouTube from Matthew Cremona. The walnut came from a cabinet Dave & Lisa had that was damaged in the hurricane that destroyed their home. Thanks to Armand and Mary Jo for offering to drive it to Wisconsin!